
FREE Guide to
DIY Concrete Countertops
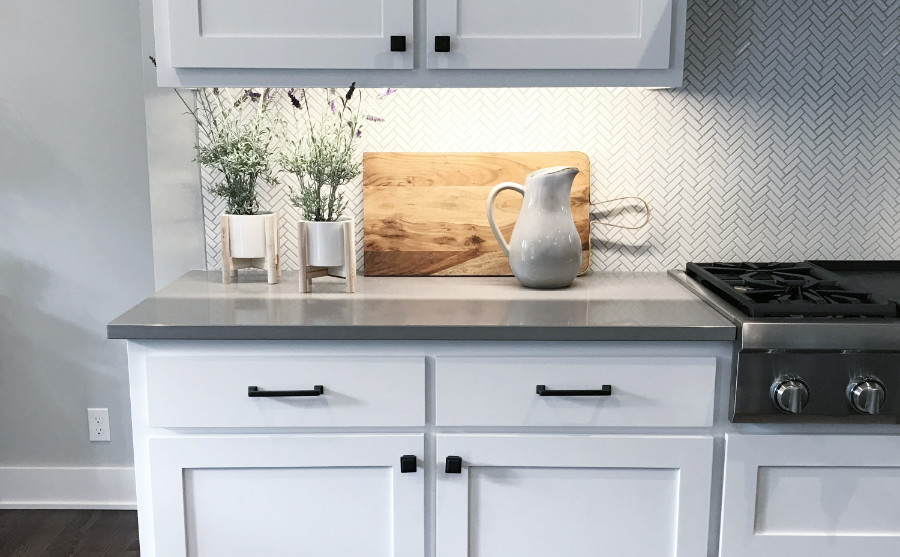
This guide will provide you with the knowledge to make your first successful do-it-yourself concrete countertop. Avoid common mistakes and create the countertop of your dreams.
How To Build A Concrete Countertop?
Hi, I’m Jeff Girard. I built my first concrete countertop in 1999. Back then, I didn’t have a guide to follow, or have beautiful step by step DIY concrete countertop instructions like you have here.
However, what I did have was a civil engineering degree, and a passion to create something beautiful for my kitchen. I made a lot of mistakes along the way, but had you asked me if I would go on to create The Concrete Countertop Institute, and train thousands of contractors along the way, I would not have believed you.
Free Guide: How to Make Precast DIY Concrete Countertops
The aim of the following Precast DIY concrete countertop guide is to provide you with a solid foundation in concrete countertops, and to help you navigate through the most common problems you may face along the way.
I hope you are as inspired as I am in turning such an industrial material like concrete into something beautiful for your kitchen, bathroom, or any countertop project.
– Jeff
PS – If you prefer video training, please check out my FREE online seminar Precast DIY Concrete Countertops with Mix Design.
The overall process of how to make a concrete countertop is:
- Template the space
- Build your forms
- Prepare the reinforcing steel
- Mix the concrete and pour it in the forms
- Allow it to cure
- Strip the forms
- Wet polish with diamond tooling
- Seal
- Install the slabs
The concrete is made 1.5″ thick and weighs about 18 pounds per square foot. An 8 foot long kitchen countertop slab would weigh about 300 pounds.
Table of Contents
Chapter 1
Safety & Tools
Chapter 2
Setting up your workspace
Chapter 3
Templating your countertop
Chapter 4
Chapter 5
Reinforcing your countertop
Chapter 6
Mixing your concrete
Chapter 7
Casting & curing
Chapter 8
Processing & grouting
Chapter 9
Sealing & installing
Chapter 1
Safety & Tools
In this chapter we will cover basic safety guidelines and tools you need to create your very own concrete countertop.
First we will cover how to be safe, and then we will talk about the basic tools you will need.
Safety Guidelines

Before you begin any DIY concrete countertop project, it’s important to think about safety.
Tips for safety
- Concrete is heavy, know your physical limitations and get help when needed.
- You will be using power tools, consult the manufacturer on how to use any power tool before use.
- Always use personal protection equipment (PPE) before beginning any project.
- When working with raw industrial materials, it’s important to understand any associated risks. (link)
- Anyone who transports concrete countertops needs to understand compressions vs. tension.
- It’s important to plan ahead, because once you mix concrete, you can’t turn back.
Concrete Countertop Tools
The most common tools you will need to begin your diy concrete countertop tools are the following:
- Protective face masks
- Nitrile gloves or hand protection
- Safety glasses or goggles
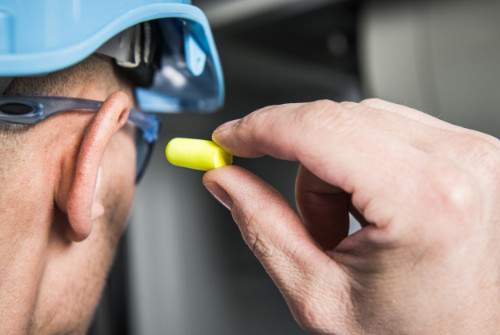
- Ear protection
- Clothes you don’t mind getting dirty
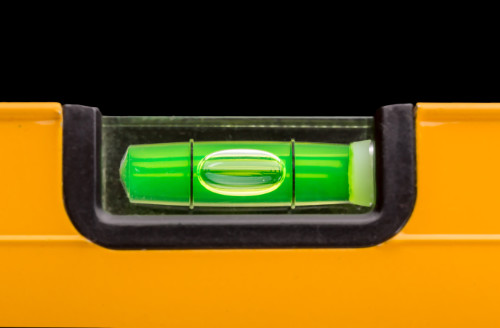
- Level for flat surfaces
- Hot glue gun for templating
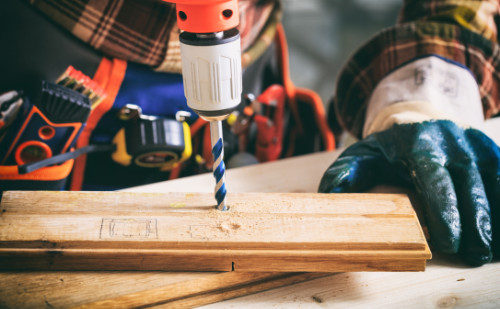
- A screw driver or drill
- Commercial mixer
- Scale for mixing concrete
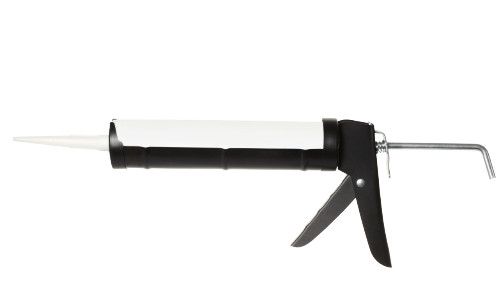
- Caulking gun
- Caulking bead tool
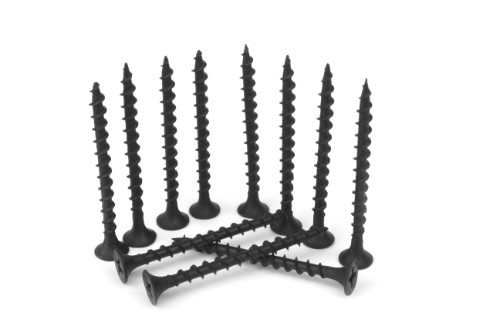
- Screws to build the mold
- Sanding Equipment or grinder
- Diamond sanding pads (may use sand paper for light use)


Recap
To build a precast concrete countertop, you will need some basic tools, materials, and plan for safety. Please refer to the list above before beginning your project.
Chapter 2
Setting Up Your Workspace
Chapter 2 is all about setting up your workspace environment to make your precast concrete countertop.
If you are a DIYer, a common garage will do just fine.
Concrete Countertop Workspace

What’s The Right Workspace For You?
To build your precast DIY concrete countertop, any open space in your garage or basement will be just fine. You will want to use this space for a few days, so alert anyone in your house on your upcoming plans.
DIY CONCRETE COUNTERTOP TIP #1
You will need ways to manage water, so make sure the workspace you choose can afford to get dirty.
DIY CONCRETE COUNTERTOP TIP #2
You will need to transport your concrete countertop from your workspace. Keep in mind of any constraints, stairs, or tight spaces that will not allow you to move your finished project. Measure more than once!
The right workspace will have the following;
- Access to water
- Open space
- Okay for the space to get dirty
- Can be used for days
- Access to power
- Proper lighting
- Will allow for the transport of the countertop out of the workspace
- Ventilation
- Flat surface to work on
- If you use supports (like a saw horse) do not place them more than 4 ft. apart

Recap
You don’t need a specialized space to build a precast concrete countertop. In fact, anyone can build a concrete countertop in a garage or available basement. Just keep in mind, you will need to move your finished precast countertop, so measure any tight spaces, corners, or doors before you begin.
Chapter 3
Templating
In this chapter we will learn how to build your concrete countertop template.
Taking the right measurements here, will lead to a more accurate fit! So measure twice!
What Is Templating?
Templating for concrete countertops starts with creating a physical mockup of your current countertop space. Good and accurate templates ensure an accurate fit, and gives you the dimensions you will use in Chapter 4 called Forming.
Templating is also the time to locate sinks, fixtures, and any concrete overhangs you will have. And it is also a good time to double check your site conditions (like stairs, doorways, tight spaces.)
DIY CONCRETE COUNTERTOP TIP #3
Making big slabs for your concrete countertops means you have fewer seams, but keep in mind, it gets very heavy. If you have limited help, it may be wise to break up your concrete countertop into multiple sections.
Tools & Materials
- 1/8″ door skin, and cut them down into 2″ and 3″ pieces. (Door skin is the easiest to cut)
- A set of compound sheers (We do not recommend sawing your door skin pieces)
- Tape measure to verify existing fixtures
- Hot glue gun
- Pencils & colored markers
Building Out Your Template For Your Concrete Countertop
door_skin_for_concrete_countertop_template
We use door skin to start building out a physical mockup of the countertop space. The 3″ wide pieces are used for the main edge, and the 2″ pieces are used for the cross sections of the template.
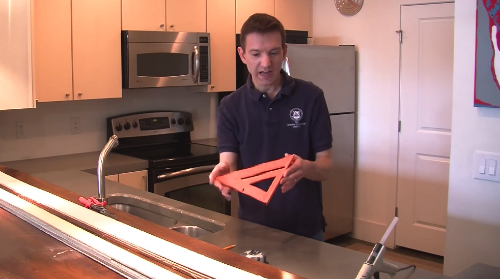
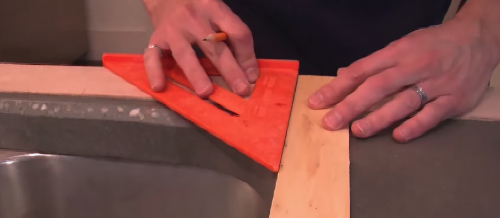
speed_square
A plastic speed squared is recommended over metal to keep from damaging existing fixtures and appliances. The speed square is used to make accurate cuts.
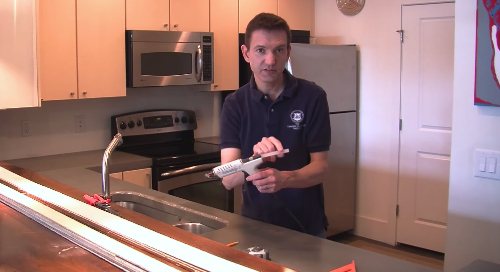
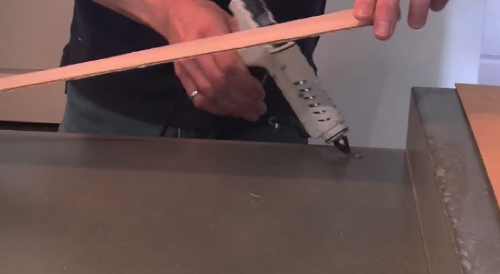
hot_glue_gun
A hot glue gun is used to adhere the template to the existing countertops, and to other door skin pieces.
secure_the_template
Make sure to adhere the template to the countertop. You do not want any shifting during the mockup phase.
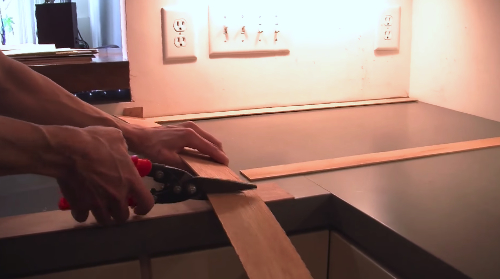
compound_sheers
Use compound sheers to make accurate cuts without damaging the door skin.
smaller_pieces_go_across
The narrower 2″ door skin pieces are used as cross sections.
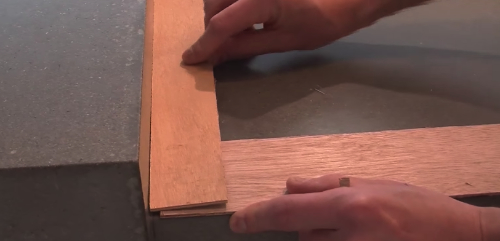
Flush_edges
Make sure your template is flush to every edge. This ensures you have the most accurate shape & dimensions for your concrete countertop.
mark_appliances
Use your colored markers to highlight where appliances are.
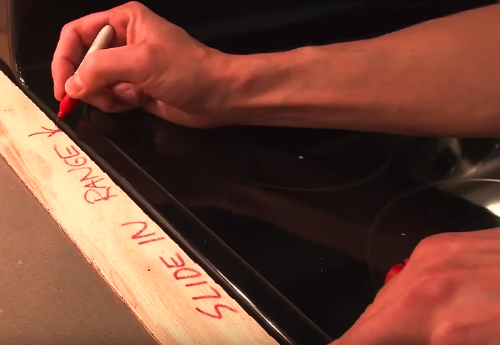
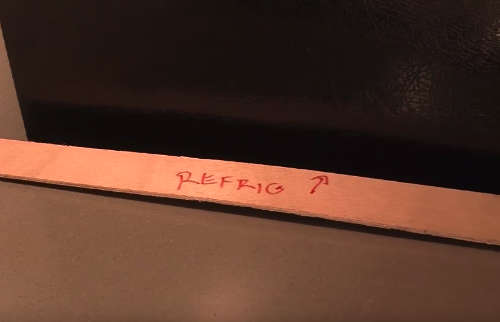
Mark_the_template
Use arrows facing out to mark where your edges are, and if there are any appliances or fixtures.
Recap
By now you should have a physical template of your concrete countertop. You will use this template to move onto the next phase of this process, called forming. Here, we will break out the power tools and begin constructing the concrete countertop form. This is the fun part!
Chapter 4
Forming
Forming is the process of making the actual mold to pour the concrete into. Making sure your form, follows the exact dimensions of your template is very important!
What Is Forming?
Forming is the process of creating a mold out of materials (usually melamine) so that we can pour concrete into a form and let this concrete cure to the proper shape.
How To Build The Form?
DIY CONCRETE COUNTERTOP TIP #4
If you don’t have a way to cut the pieces of melamine at your home, you can see if your local Home Depot® or a woodworking shop can make the cuts for you.
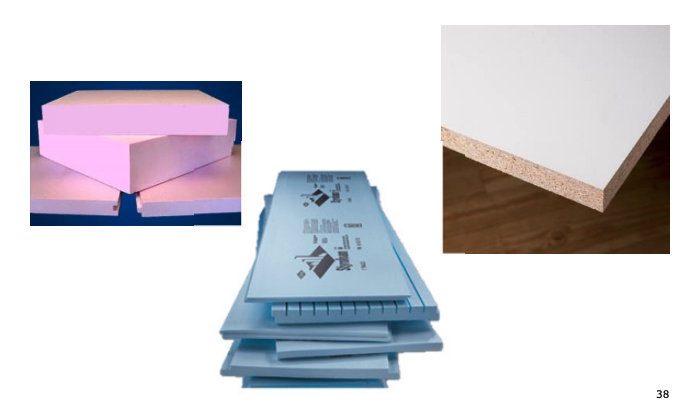
Forms must be made from materials that are smooth, dimensionally stable, straight (unless you build out a curve), and non-reactive and non-staining. Wood, steel, particle board and rigid foam can all be used, but we prefer to use melamine.
Melamine is often found at your local Home Depot® or Lowes® and is cheap, smooth, and won’t react with your concrete. It is a manufactured wood, with a smooth melamine surface.
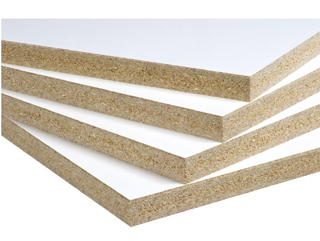
melamine
Melamine is affordable, smooth, and rigid enough to make your form.
Purchase the largest melamine sheet for your project. You will be taking this sheet home and making the necessary cuts for the sides, countertop base, and any cutouts for a sink or fixtures.
Tools & Materials

tools
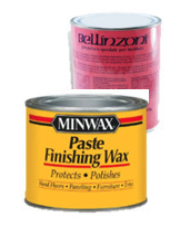
finishing wax
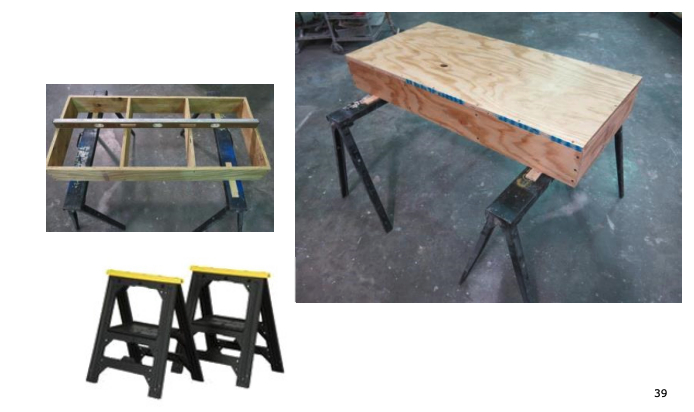
sawhorse
materials
- Drill
- Screws (Drywall screws work)
- Caulk Gun
- 100% Back Silicone
- Tape Measure
- Finishing Wax
- Saw Horses (or flat surface for a casting table – Do not put saw horses more than 4 ft. apart)
Tips
- If you don’t have the ability to cut down your melamine sheet, you can ask Home Depot® or Lowes® to make the cuts for you.
- Your work surface must be absolutely horizontal
Step 1 – Build Your Form Around Your Template
DIY CONCRETE COUNTERTOP TIP #5
Forms affect the fit, finish and overall quality. Accurate forms require accurate templates.
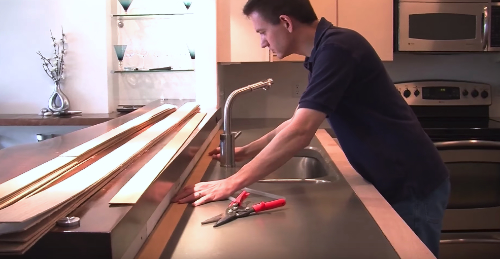
Once you have your melamine pieces, it is time to build out your form. One of the easiest ways is to lay out your base melamine sheet on a flat surface. Take your template and lay it on top of your melamine base. Now start constructing the sides making sure that the template sits flush around the edges.
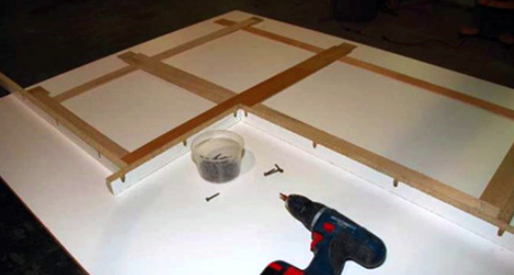
Templating
On a flat surface, lay your template on your melamine base. Now take your melamine sides and adhere them to the base with screws.
Step 2 – Forming The Sink Knockout
DIY CONCRETE COUNTERTOP TIP #6
Never sand melamine. You need to prevent concrete from leaking water during the curing process.
The easiest way to form the sink knockout is with a piece of foam, or with melamine strips cut to size. This is a good time to grab your sink template and use it as your guide.
Tips
- Make sure your sink form is higher than the melamine sides. You want to pour concrete to the top of the melamine sides, but not over the sink form.
- Use your sink template for accuracy.
Sink_knockout
You can use foam, or build out a melamine sink knockout. Here we are using foam with custom curves to form the sink knockout.
Step 3 – Forming The Faucet Knockout
Forming your faucet knockout for your concrete form is slightly different. With faucet knockouts we recommend using a circular mold for your faucet holes. However, you absolutely need to have the faucet before you build your form. Every faucet is different, so don’t guess!
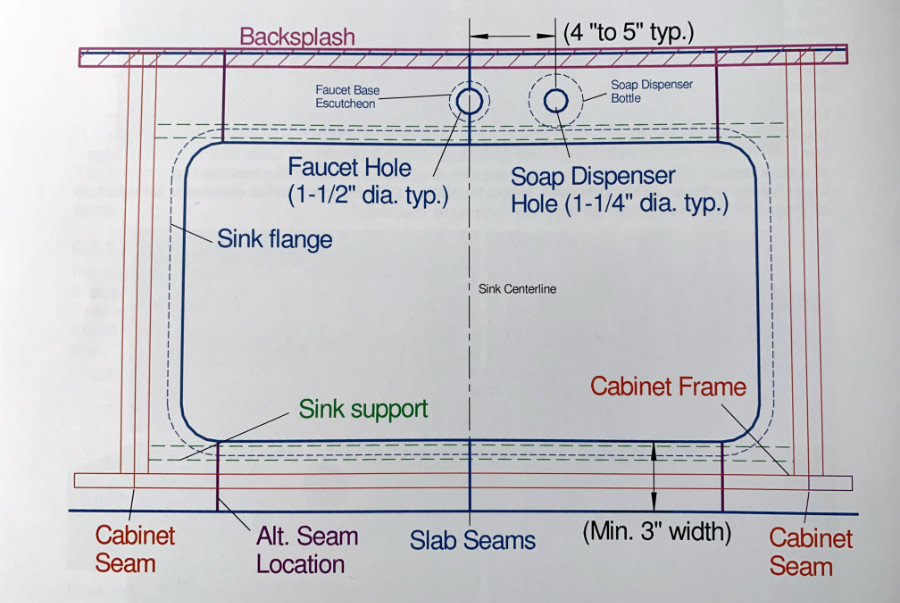
countertop_sink_faucet_knockouts
Make sure to use your sink and faucet templates from your manufacturer. Measure the proper depth from the edge of your countertops to your sink opening, as well as for your faucet.
Tips
- Use a silicone sink knockout sprayed with wax or a release agent
- Glue your sink knockout to your melamine base
Caulking Your DIY Concrete Countertop Form
Caulking is not used to waterproof your forms. It is used to save a lot of time, as your concrete countertop edges will be true. If you do not use silicone in your form, you would need to grind and sand your concrete countertop once it has been cured and pulled out of the form.
DIY CONCRETE COUNTERTOP TIP #7
Use 100% Black or Colored Silicone.
Steps
- Wax your forms (allows for easy removal of your silicone)
- Apply 100% black silicone around your edges
- Use a caulk tool to form a uniform bead
Recap
Here is what you have done so far. You have used your template created in Chapter 4 to build your melamine base to size. You then used this template and constructed your melamine form.
Both your sink and faucet knockouts were added to the melamine form. The last stage of the process requires you to apply an even bead of 100% silicone to maintain uniform edges and save you a ton of time!
Tips
- The forms must fit the templates exactly
- You’re working upside down
- Check, double-check and triple-check your forms against the templates
Chapter 5
Reinforcing
In this Chapter we will learn why reinforcing concrete countertops are critical to your success, especially with precast DIY concrete countertops.
Why Reinforce Concrete Countertops?
Proper concrete countertop reinforcing is critical to your success. Without reinforcement, your concrete countertop may suffer from cracks or damage during installation, or even show signs of damage over time.
Keep in mind that precast concrete countertops need to be moved for installation, and therefore it is a good idea to provide at least some form of reinforcement.
Reinforcement Tips
- The longer the slab, the more it will bend
- The thinner the slab, the more it will bend
- The more weight you put on the slab, the more it will bend


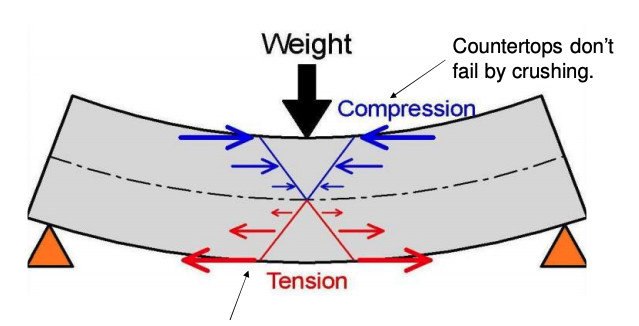
Compression_Tension
Never reinforce a concrete countertop in the middle of the slab. A countertop needs to be reinforced near compression or tension spots.
Compression is the opposite of tension, so as one progresses down the concrete countertop, the compression stress gradually decreases to zero and then the stresses reverse, go into tension and gradually increase towards the bottom of the beam.
This is why you never want to reinforce a concrete countertop in the middle where the compression is minimal.

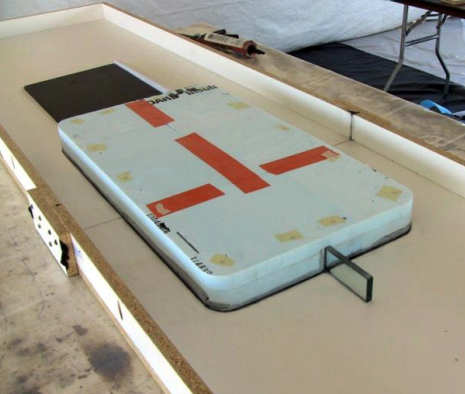
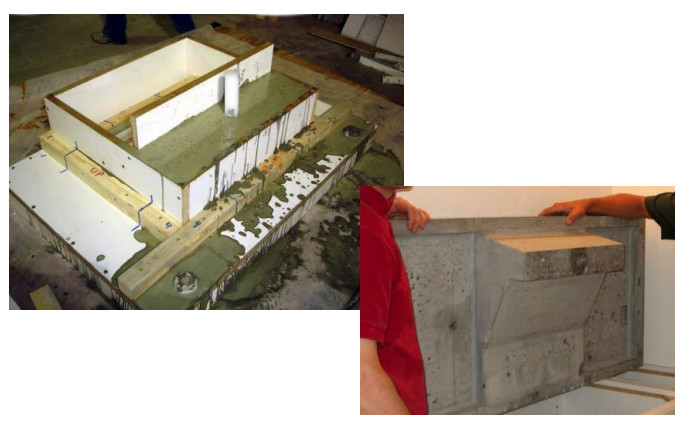
what_reinforcing_can_do
This is what reinforcement can do! Over 500 lbs. of sand on a 1.5″ concrete countertop with zero cracks!
Tools Needed

Do not use reinforcing greater than 3/16″ (4.8mm) diameter for concrete that is less than 3″ (75mm) thick.
DIY CONCRETE COUNTERTOP TIP #8
Since the tension (and compression) at the center of a beam are zero, placing reinforcing there does absolutely no good. Place the reinforcing at the bottom where all the tension forces are.
Materials Unsuitable For Reinforcement


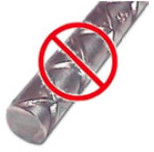
Stucco mesh wire, and galvanized fencing is not recommended for reinforcement. In addition, rebar of any size, or fiberglass (GFRC is the exception) is typically not suitable for reinforcement.
How to reinforce concrete countertops


DIY CONCRETE COUNTERTOP TIP #9
Never push your reinforcing through the concrete, or pour the concrete onto the wires. Doing so can create what is called ghosting, or permanent visible lines that show up when your countertop cures.
- All reinforcement steel should be placed as reasonably close to the edges of the slabs as possible (1″ or 25mm is ideal). However, there should be at least 1/2″ (13 mm) of concrete between the extreme face of the steel and any form edge.
- There should always be at least one continuous or spliced (if allowed) strand running along the full length of the edge for each slab side.
- The reinforcement is embedded into the concrete to a point where no more than 3/8″ (10mm) of concrete covers the uppermost surface of the reinforcing steel. Ideally there is 1/4″ (6mm) of concrete covering the steel.
- Parallel strands of steel should have a space of at least 1/8″ (3mm) between adjacent strands. This is to permit a full wire surface concrete bond.
- For non-cantilevered slabs (i.e. regular countertop slabs), the steel is located only in the underside of the slab.
- For cantilevered slabs, the reinforcing is in two layers: the primary steel reinforcing located in the underside of the slab, and the cantilever reinforcing (steel or carbon fiber) located near the top, visible side of the slab.
Chapter 6
Mixing
Here’s the fun part! We have built our concrete form and are now ready to pour concrete. Before we do, we have to understand a few things about how concrete works!
Understanding Mix Design for DIY Concrete Countertops
With proper planning anyone can mix beautiful concrete for your countertops. However, if you miss a few steps, or add too much water, your countertop may not turn out as expected. Follow these tips and you will be on your way.
What You Will Need
- 5 gallon buckets for mixing concrete
- A digital scale for measuring
- A mixer (you can often rent these)
- Cement (purchased at your hardward store)
- Sand (also purchased from your hardware store)
- Superplasticizer (make concrete more liquid without adding water)
The Right Concrete Needs To Have
- High early strength
- Good crack resistance
- Low shrinkage potential
- Consistency for color duplication and long term performance
- Low cost
Basic Concrete Countertop Mix Design Formula
This formula is based on local raw ingredients and is great for any DIY concrete countertop enthusiast. It is also strong and reaches 5,000 psi in 3 days.
- 53 pounds of pea gravel
- 53 pounds of sand
- 30 pounds of Type 1 portland cement
- 5 pounds of pozzolan, such as VCAS (or just use 5 more lbs of cement)
- 11.5 pounds of water
- Superplasticizer as needed, such as Integrity UltraFlow.
Makes about 8 sq. ft @ 1.5″ thick for a concrete top
The importance of accurate water measurement:
What is Pozzolan?
Pozzolan is an admixture for concrete that replaces part of the cement and improves the strength of the concrete, enhances workability, and boosts long term strength. The pozzolan VCAS is an ultra fine ground glass. If you cannot get VCAS, just skip it and use cement instead.
What is Superplasticizer?
Superplasticizer is a type of concrete admixture called a water reducer. Water reducers make concrete more fluid without adding more water to the mix (which would weaken it).
“Superplasticizer” is another name for “high range water reducers” that use polycarboxylate chemistry. Integrity UltraFlow is one example of a superplasticizer.
The mix design above has a water/cement ratio of 0.32, which will result in a very high strength mix. However, the mix might be very stiff and difficult or impossible to mix and pour.
Adding 2.5 lbs more water would result in a w/c ratio of 0.40, which greatly reduces the mix strength. Instead, it is preferable to add a water reducer. This will make the concrete more flowable and easier to work with without compromising strength.
If you don’t have access to a superplasticizer, you may add more water slowly, up to 2.5 lbs more. It is important to keep track of exactly how much additional water you add so that all batches can be consistent.

- Add dry bulk (sand, aggregates) ingredients to the mixer first (but not the cement).
- Add the portion of mix with the pre-dissolved superplasticiser to the dry ingredients. For stiff concrete, hold back some of the plain mix water (about 1/4 to 1/3).
- For each batch, divide the mix and water into two unequal parts: one part should have 2/3 to 3/4 of the water, the other part should make up the balance of the water.
- Add the superplasticizer to the larger portion of the mix water.
- Use a stirring paddle with an electric drill. This is best done well before concrete mixing to ensure thorough dissolution.
- Make sure powdered superplasticizers are fully dissolved.
- If the superplasticizer is dry, add it slowly while stirring. Do not simply dump the superplasticizer into the water. This action will result in a sticky clump of superplasticizer that will take a long time to dissolve without vigorous stirring.
- Reserve the smaller portion of plain mix water.
- Start the mixer.
- Slowly add the dry admixtures.
- Add each ingredient slowly to ensure even distribution and to avoid fiber clumping. Blend all ingredients thoroughly.
- Large amounts of dust will be generated until the wet ingredients are added and thoroughly mixed.
- Let the ingredients mix for a couple of minutes or until all ingredients are completely blended together.
- Slowly add the cement.
- During mixing, periodically stop the mixer and scrape the sides of the mixer and the paddles.
- Dry cement and pigment tends to collect in the corners and on the blades.
- The concrete should be mixed thoroughly, with enough time allowed to ensure all ingredients are completely incorporated into the concrete countertop mix.
- Avoid excessive mixing; generally about five to ten minutes of mixing is sufficient to thoroughly blend all the ingredients.
- Check the consistency of the concrete after all of the ingredients have been added.
- For stiff, package concrete countertop mix: Gradually add some of the reserved plain mix water to the dry concrete to achieve desired consistency.
- Keep track of what you use, so you can keep consistency with other batches.
- Should the DIY concrete countertop mix remain dry and difficult to mix even after all of the mix water has been added, slowly add superplasticizer or more water to the concrete.
- Keep track of how much water is added so that the same amount can be added to subsequent batches.
- Never add plain water in excess of a w/c=0.4 (2.5 lbs more in this recipe)c
Chapter 7
Casting
Now we are ready to pour your concrete mix into your form, and create a DIY concrete countertop. By now you have put it a lot of work and understanding.
It’s time to have fun and cast your concrete countertop, let it cure, and get ready for the installation.
What Is Wet Casting?
Casting is the process of pouring your concrete countertop mix into your form. This is the final step before you see your finished product.
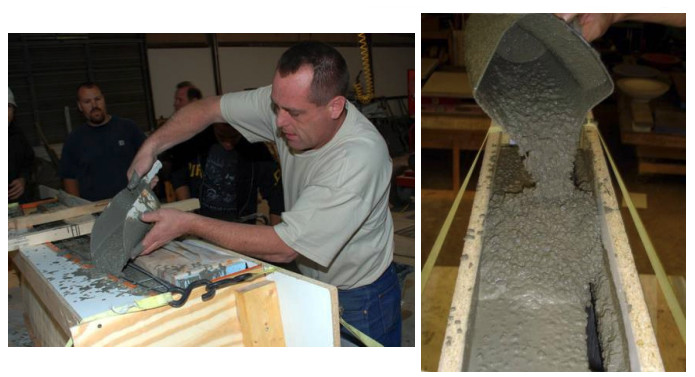
Casting_concrete
Freshly mixed concrete must be cast and cured in room-temperature conditions.
Working With Concrete In Hot Or Cold Climates
- The minimum permissible temperature for casting and curing is 55 degrees Fahrenheit.
- During hot weather (above 80 degrees F / 27C), add set retarder or use ice as part of the mix water. An alternative to retarder is to make smaller batches
- If warm concrete starts to stiffen (false-set), DO NOT ADD WATER TO THE MIX. Thoroughly re-mixing will restore some workability. If necessary, a small amount of superplasticizer can be added to restore lost workability.
- Chilling the concrete ingredients with ice (counts as part of the mix water) will increase working time. Generally 1/4 to 1/3rd of the mix water is replaced with ice (equal weight substitution). Add ice to the mixer as part of the mix water.
- The colder the concrete the slower setting rate. Concrete at 55F to 65F (13C to 18C) will set much more slowly than concrete that is much warmer. Always make sure all of the ice is fully and completely melted in the mixer before casting the concrete.
- Commercial concrete retarders will slow the set time and increase working time. Dose according to the manufacturer’s instructions.
wet_casting
You can make complete diy concrete shapes
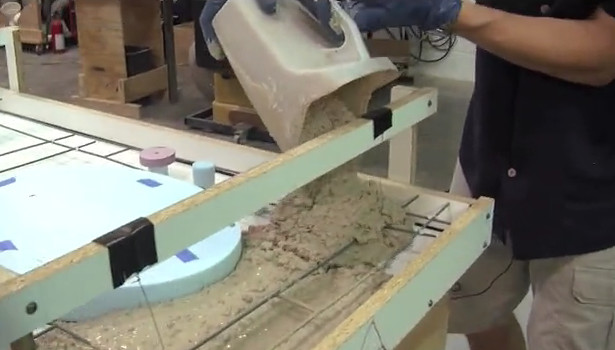
pouring_concrete
Gently pour the mixed concrete into your form
How To Wet Cast
- Before you start
- Always wear gloves and protective gear
- Remember to cast the concrete into adjacent forms in order, and that a single batch of concrete must cover a form completely.
- Remember that concrete is placed into forms before the reinforcement is added.
- Once the concrete is completely blended, discharge the mixer’s contents into a container that can be moved near your casting tables.
- Concrete left to dry or cure in the mixer will contaminate subsequent batches and will be difficult to remove.
- Place the concrete into the forms using a scoop, trowel or by hand, starting at one end of the form and proceeding towards the opposite end of the form. Do not pour it over the reinforcing wire.
- When placing concrete, allow the concrete to pile up on top of itself so that no gaps or voids get trapped under the concrete (unless that’s what you are trying to achieve). Avoid piling the concrete into mounds much higher than the forms, since that would require excessive spreading and smearing of the concrete. Also, avoid placing isolated, separate mounds of concrete for later spreading.
- After all the forms that can be filled from a single batch of concrete are nearly filled, position the reinforcement within the forms and gently place the reinforcement onto the concrete.
- Avoid pressing, hammering, or moving the reinforcement. This could cause “ghosting” or shadow marks on the finished face of the concrete that will show the reinforcing pattern on the slab face. This is often permanent.
- Once all the reinforcement is covered with a thin layer of concrete, remove any excess concrete. You can use a screed to do this.
- The goal is to create a flat, smooth slab of constant thickness. It’s better to have a slab that has a few low spots in the middle of the slab rather than hight spots. High spots and ridges can be ground off, but thats time consuming and often reveals reinforcement that protrudes above the desired surface level.
DIY CONCRETE COUNTERTOP TIP #10
Ideally you want to make all of your concrete in one batch. If you can’t make sure to pour adjacent pieces from the same batch.
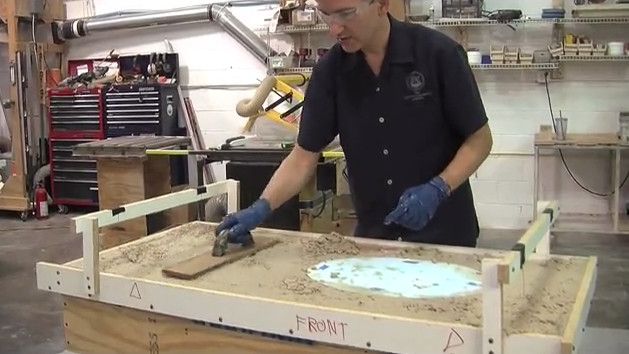
Screed_concrete
Gently screed the back of your concrete countertop
How To Cure Your Concrete Countertop
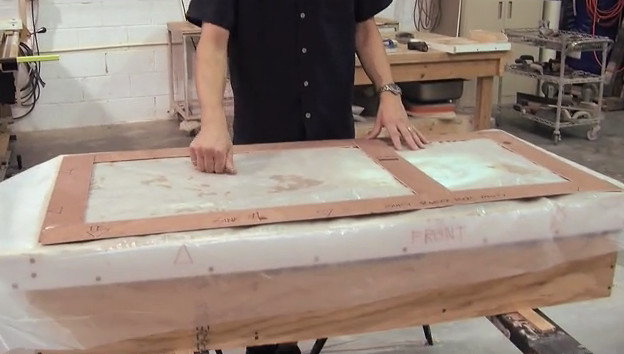
curing_concrete
To cure your DIY concrete countertop, simply cover it with plastic
Steps
- Immediately after casting, completely cover the slabs with plastic sheeting or curing blankets. Weigh down the edges to seal the sheeting against the concrete to prevent moisture loss
- To ensure proper curing, the slabs must be kept moist for as long as possible. Wet the slabs at least once per day. Freshly cut slabs must be completely covered with plastic until the slabs are stripped. As long as the relative humidity of the air under the plastic is greater that 95%, the concrete will continue to cure.
- Do not let the slabs dry out
- Curling or warping is caused by shrinkage brought about by differential drying. If one face of the slab is moist while the other is allowed to dry out, the side that dries out will shrink, causing the slab to curl towards the dry side. This is usually irreversible.

Watering_Concrete_Curing
Never let concrete dry out during the curing process
DIY CONCRETE COUNTERTOP TIP #11
A simple guideline is that if the concrete looks wet, or if the plastic tightly covers the concrete and there are beads of condensation under the plastic, then the humidity is high enough to allow curing.
Chapter 8
Processing & Grouting
The main steps in processing are flattening, grinding, honing and grouting.
How To Process Your Concrete Countertop
Flattening
The first step of processing is to ensure the underside of the slab is flat, at least around the edges. There should be no high spots anywhere.
The screeding that you did in Chapter 7 Casting, should have established the correct slab thickness. If you did not take care in this step, it may be necessary to do some hard work to remove hard concrete using a masonry rub brick.
Some grinding with a diamond pad may be necessary to ensure adequate flatness.
Grinding (Optional Step)
If you want to expose aggregate, or you have embedments in your concrete, then grinding is a necessary step. Grinding uses coarse, aggressive diamond tooling to remove a lot of material fast. To do this, you need a professional grade electric polisher such as the Flex LE12-3-100, which is available on Amazon, as well as diamond pads in grits 50, 100 and 200.
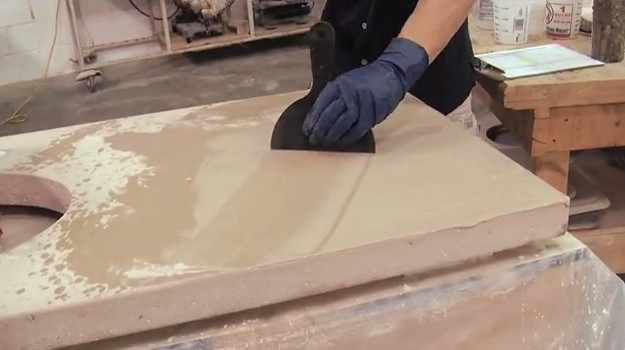
Honing

In addition, if your forms were coated with a form release agent, the release agent’s residue must be honed off. Honing is the next step after grinding or flattening.
Honing removes any marks and flattens and smooths the surface. Honing can be done by hand with diamond hand pads.
DIY CONCRETE COUNTERTOP TIP #12
Honing is basically just grinding with a finer grit.
Grouting

It’s difficult to get an exact match, and often it’s not necessary. Contrast between the grout and the concrete, slight or otherwise, is often seen as attractive and desirable by many clients.
Grout = Cement + VCAS + Pigments + Polymer

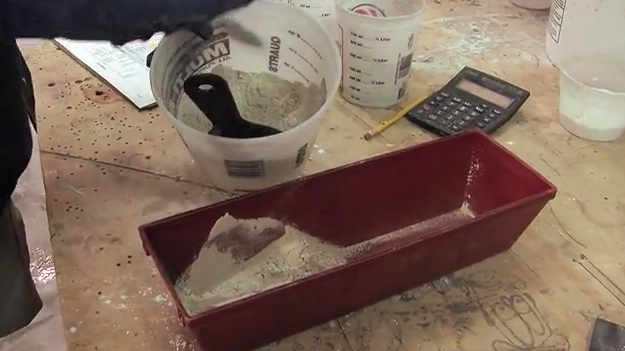
Screen Shot 2020-04-02 at 3.49.21 PM
Place your cement, pigment, and VCAs into a bucket to get ready for mixing with a polymer.
How To Make & Apply Grout
- Mix cement, pigment & VCAS (The same mix you used to make your concrete countertop mix)
- You want this to be a paste (like the consistency of toothpaste)
- Weigh out your pigment (if you used it), cement, and VCAS in in similar proportions to your original mix.
- Mix your grout, cement, and VCAS together into a powder
- Mix in a acrylic or latex polymer (you can get this at a hardware store) designed for cement. Your polymer should be the consistency of whole milk. If not, you can add a little water.
- As you are mixing in the polymer with your grout mix, look for a toothpaste like consistency
- Lightly wet the concrete countertop before applying the grout (Do Not fill pinholes with water)
- Apply the grout in small corners (You do not want to let excess grout dry as it is hard to sand off)
- Scrape excess grout off often with a paint scraper
- You may want to grout the concrete countertop twice
- Once the grout cures, hone the piece with a high grit pad (400 grit)
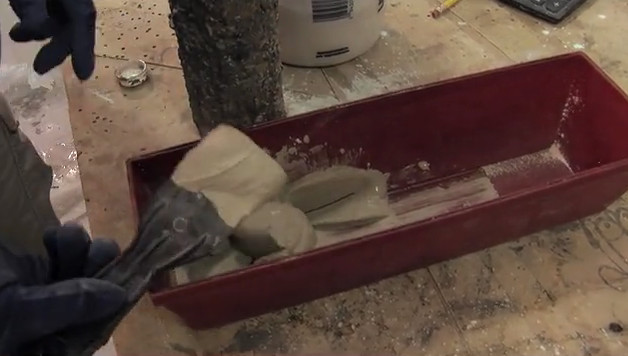
grout_all_mixed
After you mix in the polymer, the grout mix should have the consistency of “toothpaste”.
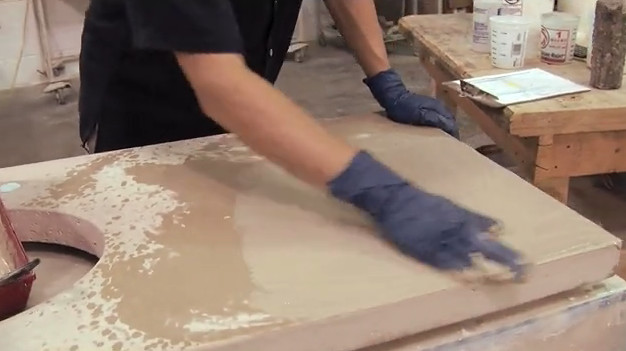
applying_grout
Fill in pinholes with grout. Make sure to lightly wet the surface before applying grout, but don’t fill the pinholes with water.
scrape_off_grout
Periodically scrape off excess grout as you are applying your grout. Make sure all the pinholes are uniformly filled.
Chapter 9
Sealing & Installing
This is it, you made it to the end. It’s time to seal your concrete countertop and get ready to install your piece.
Sealing is perhaps one of the most important steps as it protects your countertop from staining, and residue from everyday use.
Why Seal Concrete Countertops?
- Protects concrete from food, stains, oil
- Enhances the concrete’s appearance
- Should be effective
- Should be easy to use
- Should be repairable if necessary
Types Of Sealers
Concrete countertop sealers can be separated into two basic groups: penetrating treatments and topical coating sealers.
Penetrating treatments are liquids that are applied to bare concrete and soak into the concrete. They work by reacting with the concrete to decrease its porosity and increase the surface density (hardeners/densifiers) or by increasing the surface tension to cause beading (repellants).
They do not block contact with the concrete, but merely make it easier to clean up spills. They don’t provide much if any protection against long-term exposure to aggressive staining agents (like wine, mustard and oil), nor will they provide any protection against acidic items. In fact, acid usually begins to etch the concrete almost immediately.
The advantage of penetrating treatments is that they are extremely easy to apply, and since they soak into the concrete and do not leave any film, they cannot be scratched.
Topical sealers create a physical barrier between concrete and your environment. Concrete sealed with a topical coating cannot stain or etch because the staining agent never touches the concrete. Modern coatings have excellent adhesion, good scratch resistance, and a very natural appearance.
The disadvantage of coatings is that they can scratch.
I am a strong advocate of using coatings to provide the best protection against staining and etching. I’ve always found that people would rather not have to worry about staining and etching (and watermarks – that should never be an issue) than have something they can cut on. Cutting is a deliberate act, whereas spills of lemon juice, red wine, oil, etc. are accidental, or at least could be accidentally forgotten and not wiped up.
Recommended Concrete Countertop Sealer: Ovation

Comparison of Ovation with Other Concrete Countertop Sealers
Before Ovation, there were simple, easy to use single component concrete countertop sealers available, BUT they were either highly toxic or very low performance. I developed Ovation Concrete Countertop Sealer TM to address these concerns.
Ovation is the first safe, simple, single component concrete countertop sealer that actually performs.
Ovation is water based and completely food safe. The most “toxic” chemical in Ovation is ammonia, which is naturally occurring throughout the environment in the air, soil, and water, and in plants and animals, including humans. Ammonia is also found in many household and industrial cleaners. Once cured, Ovation has no remaining ammonia or ammonia odor.
Ovation provides excellent stain and acid resistance to most substances up to 1 hour of exposure. Simply wipe up spills promptly, and your surface will remain looking great for years.
You can use Ovation anywhere – indoors or outdoors, wet or dry. It has a soft satin sheen and a very natural appearance.
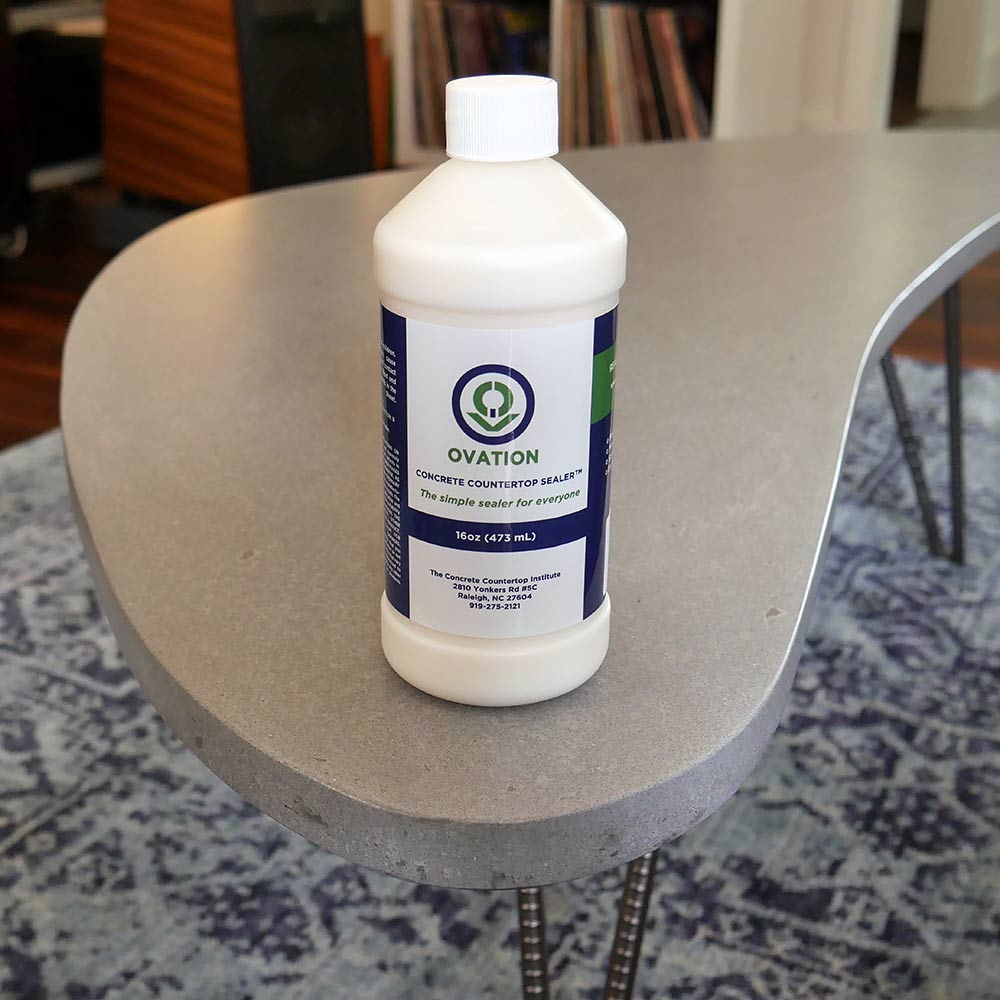
Ovation-Concrete-Countertop-Sealer-furniture
Click here for more information about Ovation Concrete Countertop Sealer.
Installing Your DIY Concrete Countertop
Installing your DIY concrete countertop is no different than installing granite countertops. You want to always carry it on a vertical side like a piece of glass.

When dry fitting is completed and the final installation process is to occur, the slabs are bonded to the cabinets using dabs of construction adhesive. The adhesive serves two important roles: it adheres the concrete countertop to the cabinets so they don’t shift, and the hardened adhesive acts as a grout bed, firmly and evenly supporting the slab.
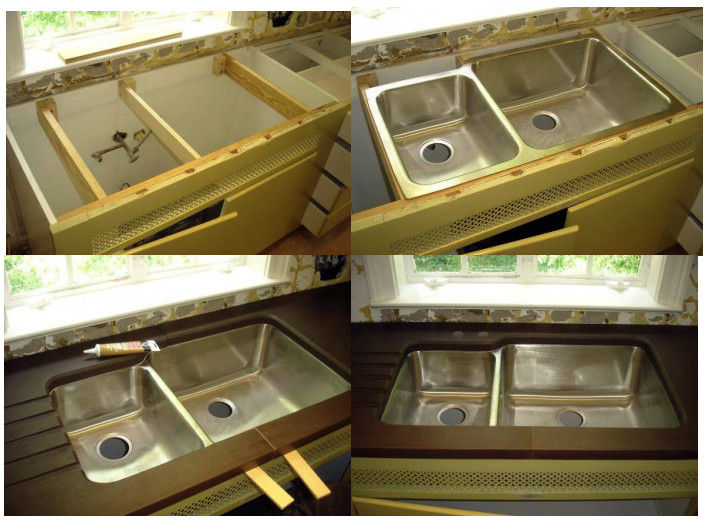
dry_fit_concrete_countertops
Dry fit your DIY concrete countertop before using zinc drywall anchors or caulking. The purpose of the dry fit is to find where you need to add shims.
Tips
- Make sure any cabinet corrections have been completed prior to installations
- The full weight of undermount sinks must be supported by the cabinets or other undercounter supports
- Most concrete countertops weigh 25 lbs. per square foot. Make sure your cabinets can support your countertop weight.
- Shimming is necessary where gaps between the countertops and the cabinet exsit. Shimming is also required when the finished surfaces of two adjacet slabs are not flush with each other.
- Apply a generous bead of caulk (at least 1/4″ to 3/8″ – 6mm – 10mm) to one slab before the adjacent slab is placed. Once the adjacent conctrete countertop slab is positioned, the caulk will squeeze out
- Use a damp (but not wet) sponge to carefully wipe excess caulk.
- Wipe away from the seam, and not in a parallel motion.

Conclusion
Next Steps
Now it’s time to get started on your own creative concrete project!
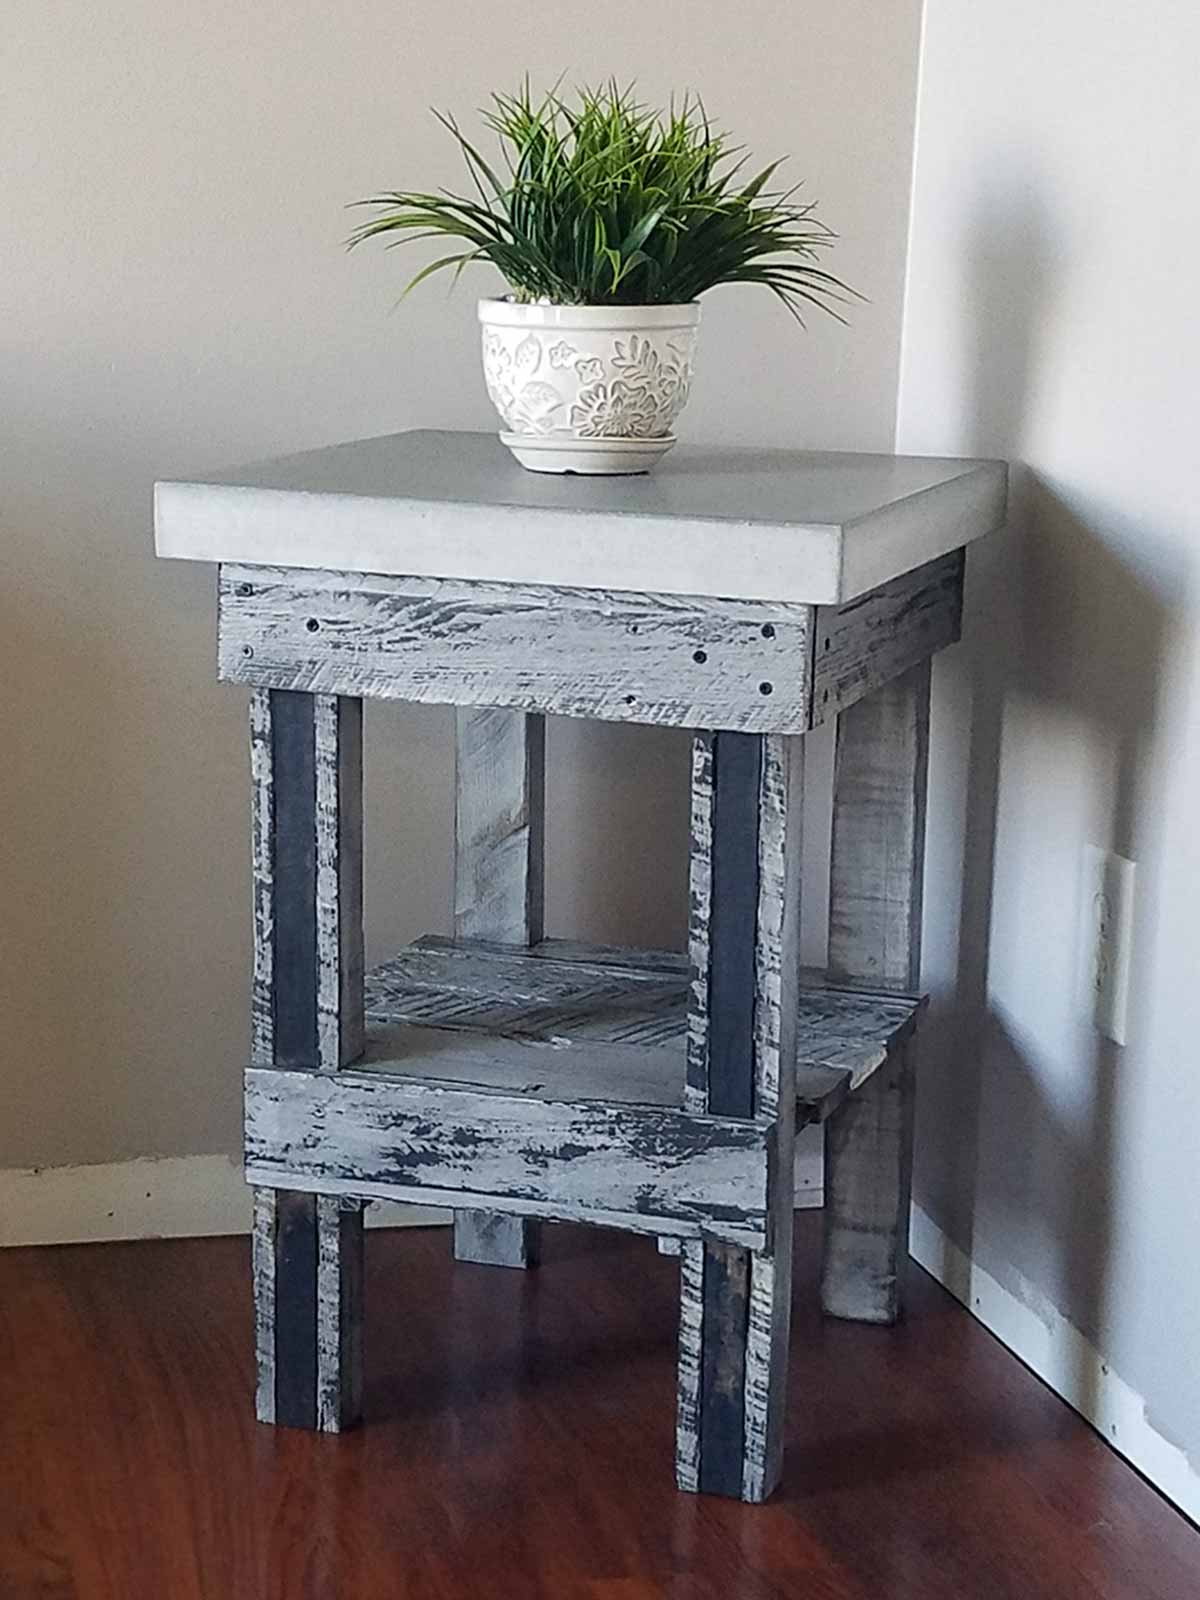
The possibilities of concrete are endless. Check out the DIY success stories below.
“Holy cow I couldn’t believe…”
Here’s a DIY concrete countertops success story that really “cracked me up” (despite the fact that he couldn’t crack his countertops):

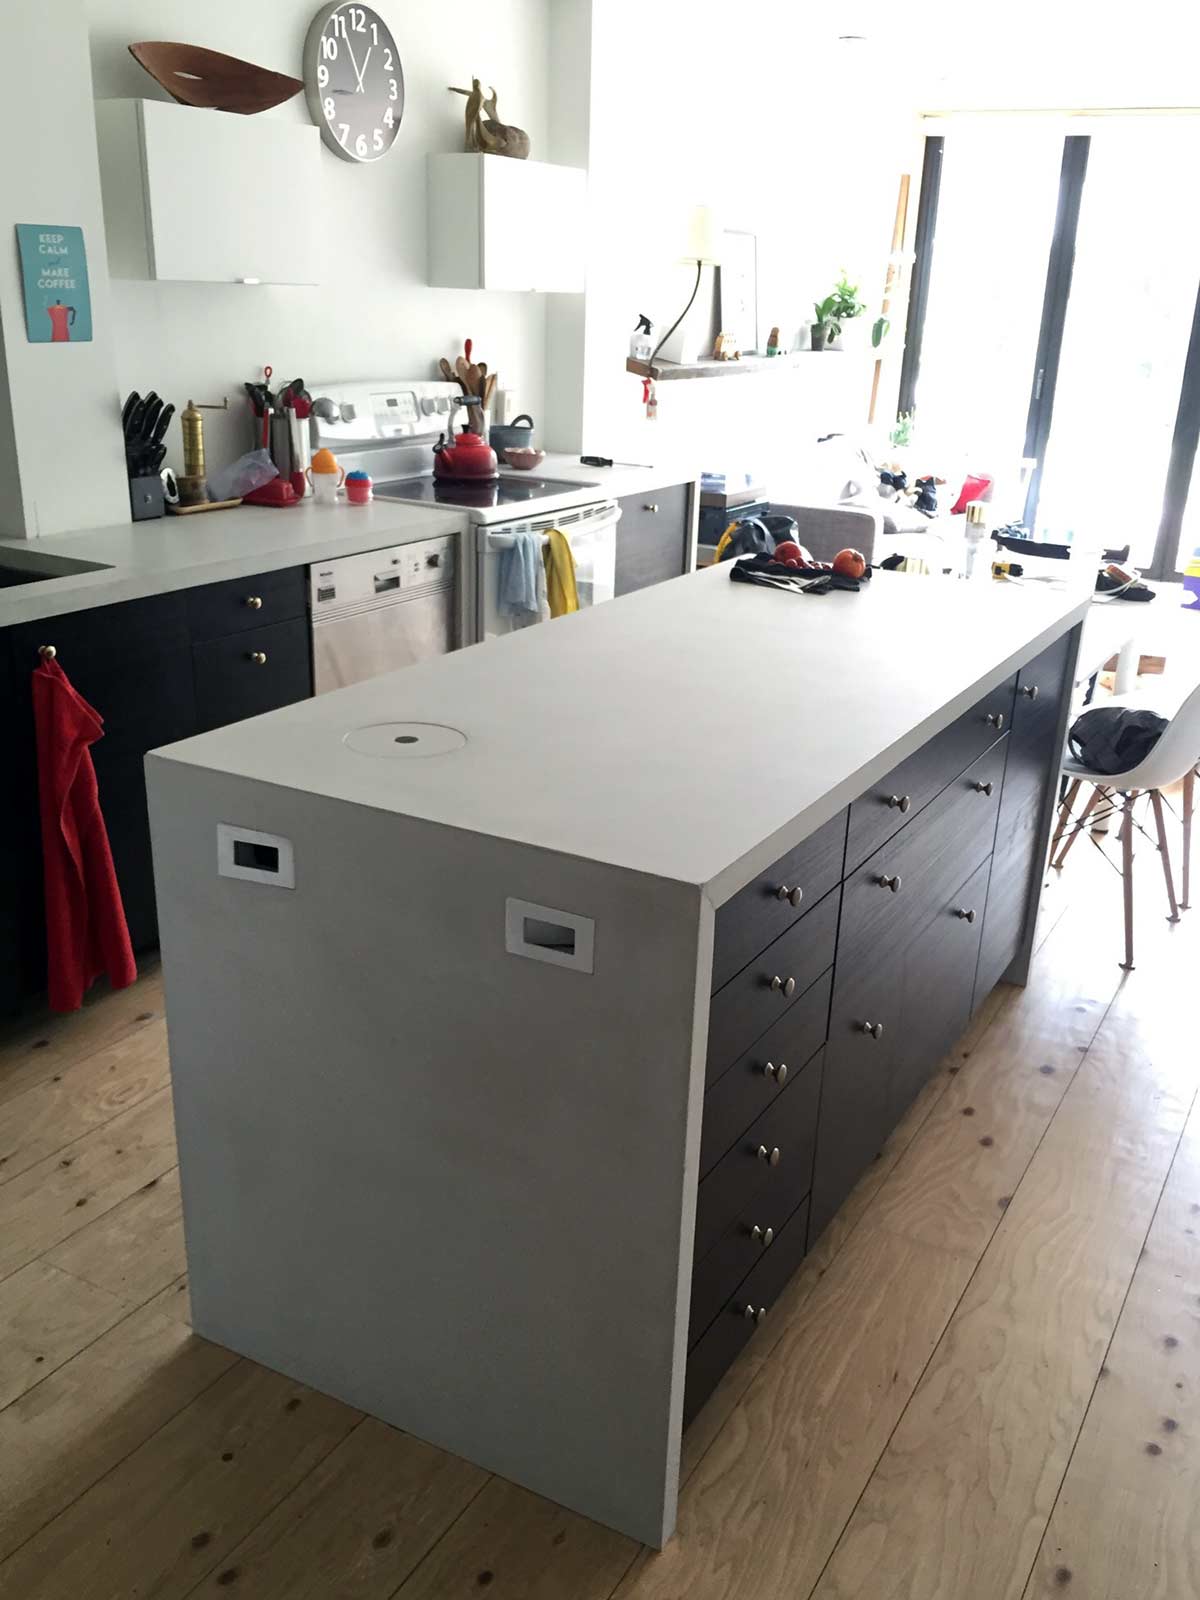
I was flabbergasted at how hard it was to make them. No wonder they cost as much as granite. The materials were relatively cheap like $250+/- here in Denver for everything, but the sheer amount of labor involved was totally unexpected.
Also, they are really f-ing heavy. Holy cow I couldn’t believe how much a slab could weigh. The corner slab weighs almost 400lbs. Yikes.
Thanks for the info it was invaluable and made my first attempt a success….errrr…..I actually made the first ‘L’ mold upside down so when I pulled the mold after three days the counter top was backwards.
This sent me through the roof. I tried to smash the slab with a sledge hammer in frustration, but only hurt my hands as the sledge bounced right off and reverberated up the handle, shaking my bones.
This infuriated me so much I tipped the slab up on end and pushed it out of my garage and succeeded in badly damaging my driveway.
Clearly the formula you provide for making very solid counter tops is correct. I literally could not demo the slab. I couldn’t even crack it ‘throwing’ it around. I was then suddenly very pleased that the next ones would be super strong and do what I needed them to do.
I think they look pretty cool.
– Willis”
They sure do, Willis! Great job!
DIY Concrete Countertop Video Training
Willis used the “How to Make Concrete Countertops: The Ultimate DIY Video Training” online video training to make his unbreakable countertop.
This online video training goes far beyond the information provided on this page and includes:
– Over 7.5 hours of detailed, live-action videos explaining every step!!!
– A 3-hour seminar explaining how to get started with concrete countertops.
– A 67-page step by step textbook
This unique online course includes extensive live action video. I will be with you every step of the way guiding you, showing you what to do next, and revealing the advanced “insider secrets” to give you a fulfilling result.
I hope you’ll consider taking the next step towards making your DIY concrete project a reality by checking out How to Make Concrete Countertops: The Ultimate DIY Video Training.
Here are some more examples of projects that DIY students have made:
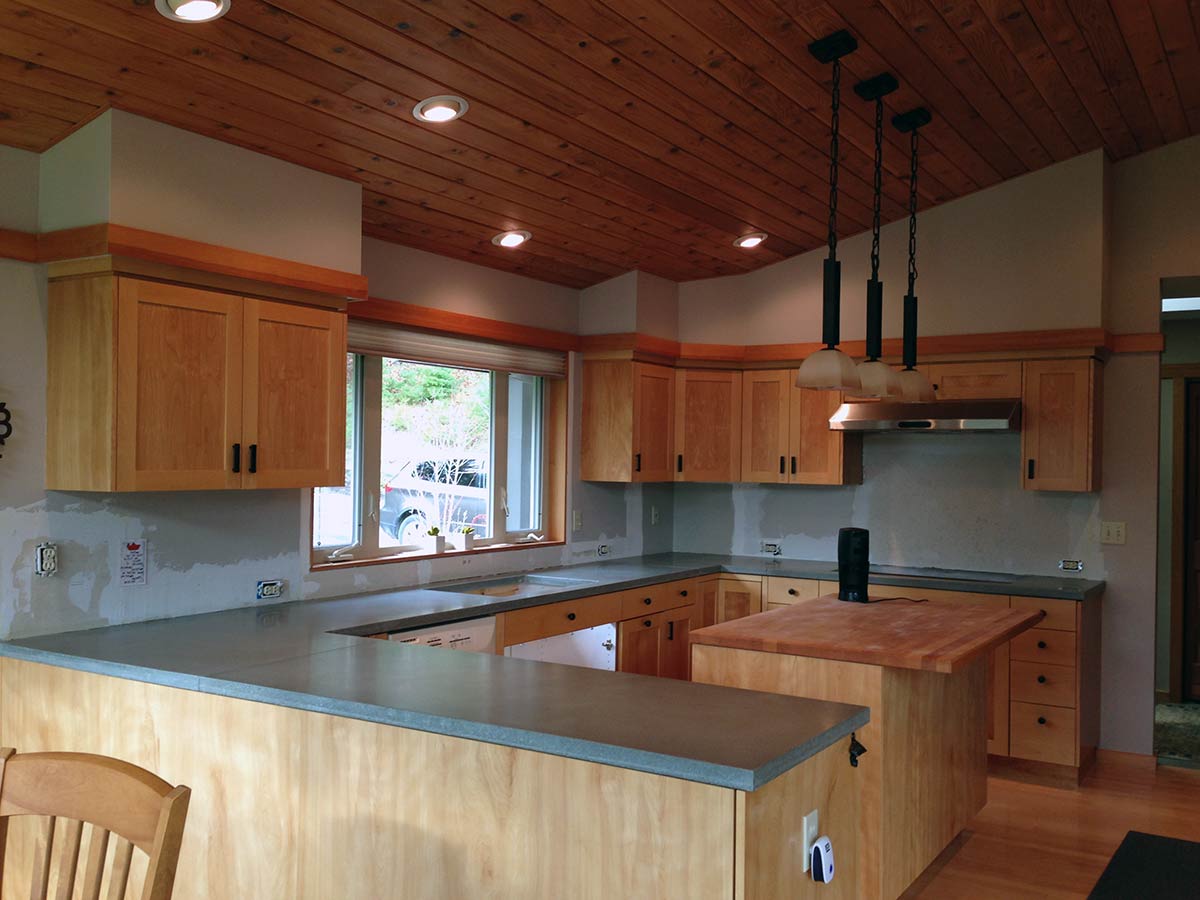

However you choose to continue your concrete countertop learning, whether it’s with the How to Make Concrete Countertops: The Ultimate DIY Video Training or not, I look forward to helping you as you discover the endless possibilities of concrete.
– Jeff