
Want to create natural stone texture in concrete? This old-school technique uses ordinary baking soda to create weathered limestone, fossilized coral, and custom patterns – perfect for both small DIY projects and professional architectural work.
Whether you’re creating decorative wall panels, textured countertops, or custom concrete art, this technique works for projects of any scale. Here are two examples of whimsical textures created with baking soda:
Below, I’ll show you exactly how I created the zebra-patterned wall panels, including the science behind why it works and tips for getting consistent results. Or, if you prefer, you can watch this video:
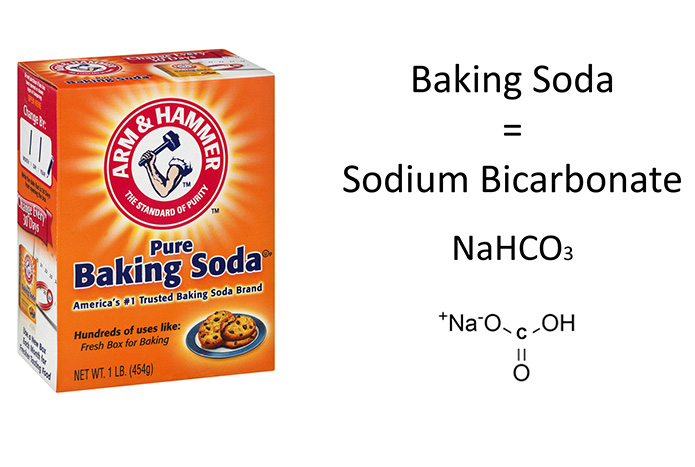
Any areas where concrete touches baking soda freeze up to hold the shape and texture of the baking soda. Baking soda is also known by its chemical name, sodium bicarbonate. Sodium bicarbonate acts as an accelerator in concrete, causing it to rapidly stiffen.
The surface of the concrete that touches the baking soda stiffens to form a crust that can wrinkle, crack, and deform during casting. This is where the stone like texture comes from.
I first learned about using baking soda with concrete to create these textures from a student back in late 2007, or very early in 2008. He was involved in the cast stone industry. He told me that it was an old school technique used to create the look of weathered limestone, fossilized coral, and other natural stone textures.
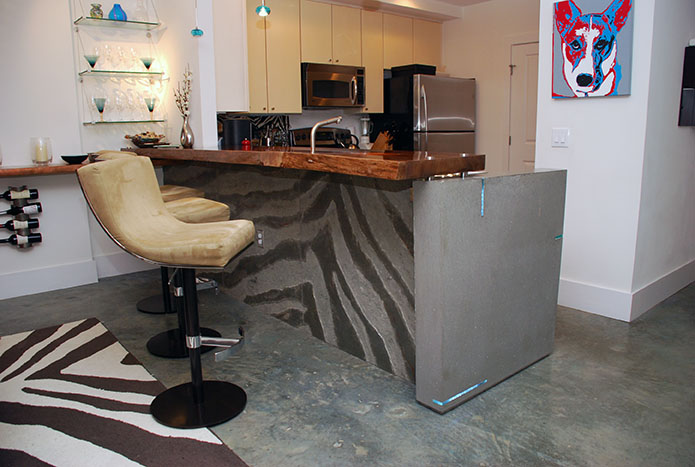
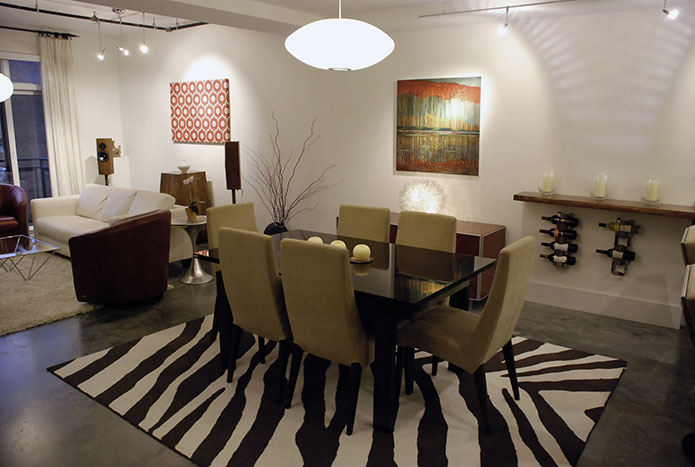
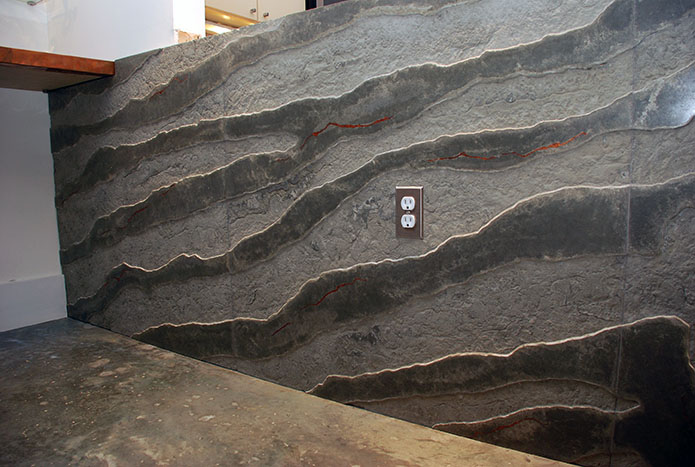
The first time I made something using baking soda was for a cool project I did in May 2008 for wall panels under a bar in my condo. I wanted the panels to exactly match the pattern of a zebra rug under the dining room table.
It was a really easy process. Here’s how I did it. Here’s the rug with the pattern.
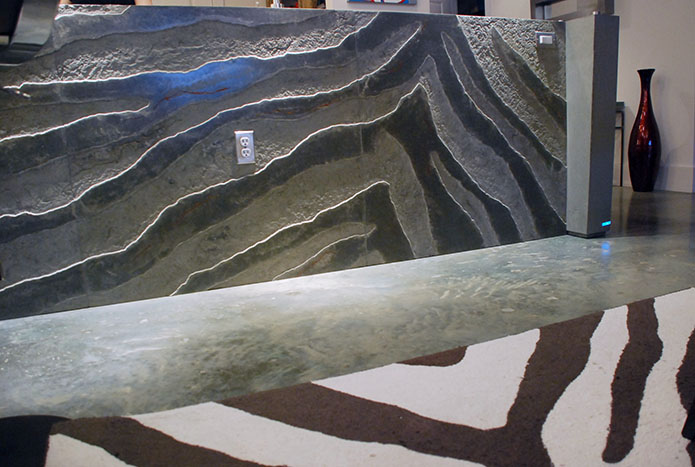
There are three wall panels. Each is about 40 inches tall or a little over a meter tall. The three panels are about 10ft wide total. Each panel is roughly square. The rug isn’t that wide, so I had to stretch the pattern and extend it out to make the pattern fit the space. But that was pretty easy to do. I’ll show you how I got the pattern into the molds.
With every project, you start with template. Here there are three individual template pieces, one for each of the panels. You can see that one panel has an electrical switch in the corner, one has an electrical outlet kind of in the middle, and the third has a notch to fit around a copper bar. Each panel had to be shaped to fit its space and accommodate the openings for those outlets and switches.
To capture the pattern, I bought a roll of clear acetate film, laid it on the carpet, and then use black sharpie to trace. I used the letter B to indicate where the brown was in the carpet. It was just a way of designating which patterns were dark and which were light. In the following photo, the film has been flipped over, and I’m tracing the pattern again onto the underside of the film using a red grease pencil.
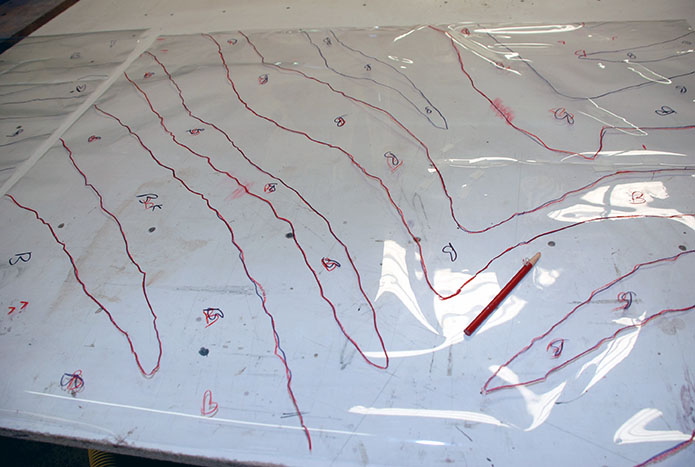
In some areas, I had to change the pattern a little to accommodate the outlet or the switch. You can see in the following photo, I had to stretch the pattern so that it would fit around the outlet. I ended up modifying it even more and making it wider so that the space around the outlet was more balanced.
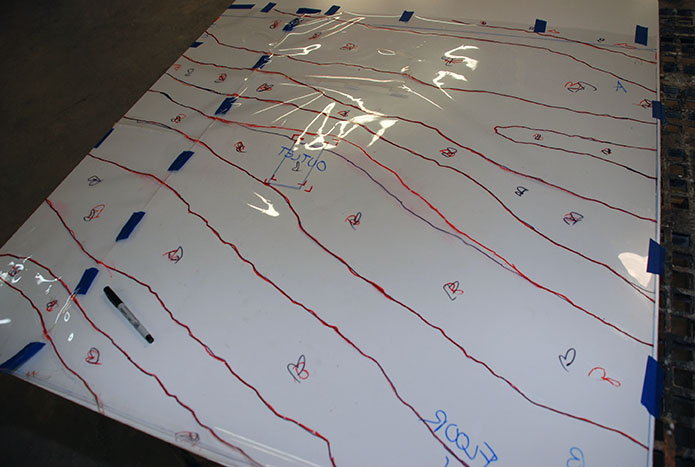
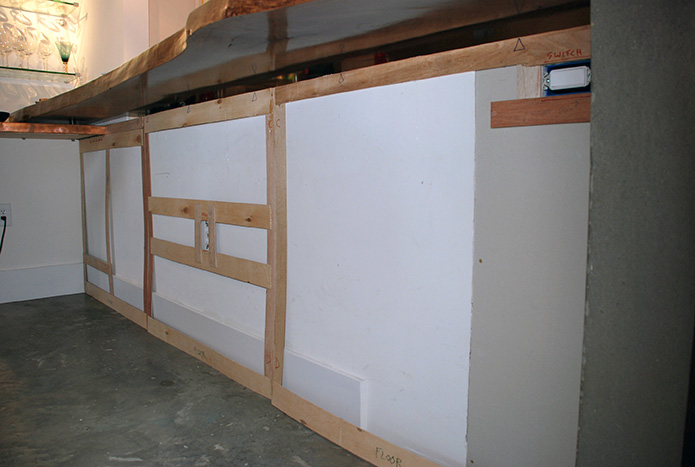
The reason why I used grease pencil on the underside of the film was so that I could rub the top surface of the film and transfer it onto the mold surface. I didn’t transfer directly into the bottom of the molds themselves, which were just very shallow melamine boxes. What I wanted was the pattern to not only have baking soda texture, but I wanted it to have more depth to it as well. What I’m doing in the next photo is I’m transferring the pattern onto 3/16th inch Masonite hardboard that has a melamine coating on it.
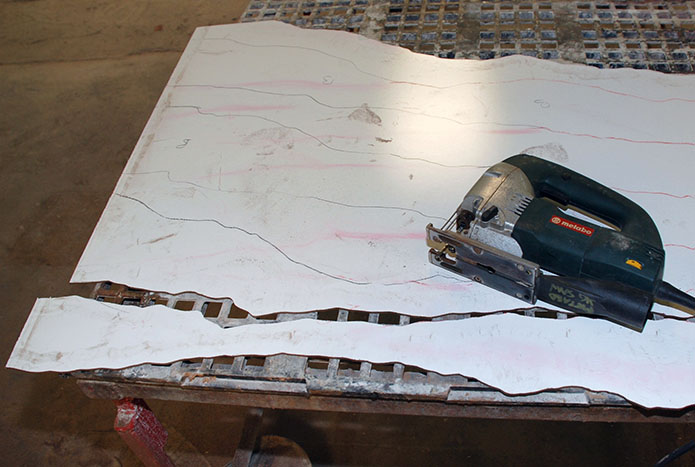
After I transferred all the pattern, I cut it out with a jigsaw like a puzzle.
I had all these pieces that match the pattern and the rug, and I then laid them into each template. I used a black crease pencil to indicate which of the pieces were going to go away. And they were used just to be able to align the cutouts that I wanted to keep so that they were positioned correctly and allowed the pattern to be aligned across the panels.
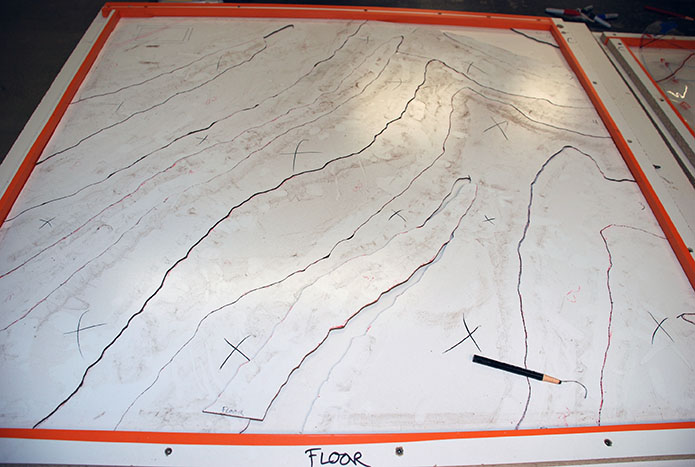
Once all these were placed and then glued down (I just used construction adhesive), I removed the waste pieces that were marked with an X.
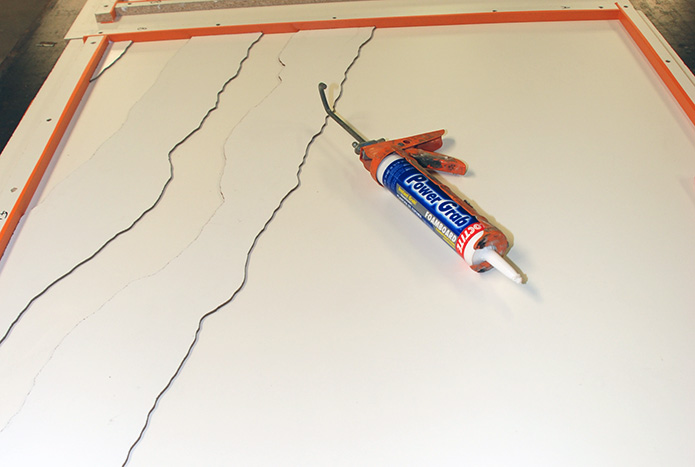
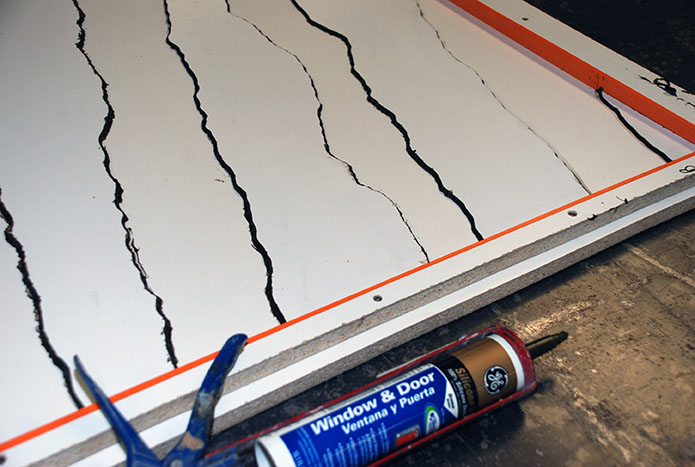
I caulked all the edges with silicone caulk. This not only sealed the edges of the Masonite, but it also helped the concrete release from the molds more easily.
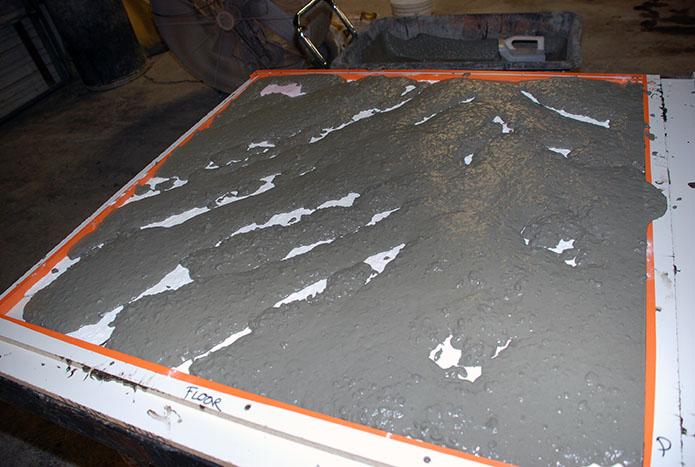
This is where the baking soda comes in. I used ordinary household baking soda. It doesn’t matter what brand. For this purpose, they are all the same.
I used it dry. The only thing I did to it was dump it into a cup and break up any clumps so that there were no giant lumps. You can cast over lumps of baking soda, but it gives a different texture, it gives an interesting texture. How much baking soda you put down and what the surface texture is influences what the concrete will look like when you cast on it.
Here I’m applying a couple of millimeters layer of baking soda. It’s not just a powdery dusting on top of these areas. I used a dry, stiff bristle brush to even the texture out so it didn’t look too artificial.
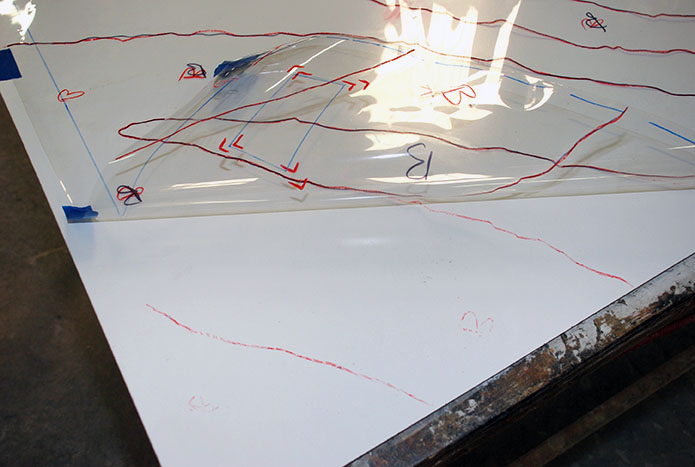
(The little black squiggles are silicone that I drew into the molds to create fissures and veins that I later filled in with copper colored epoxy. You’ll see that later on.)
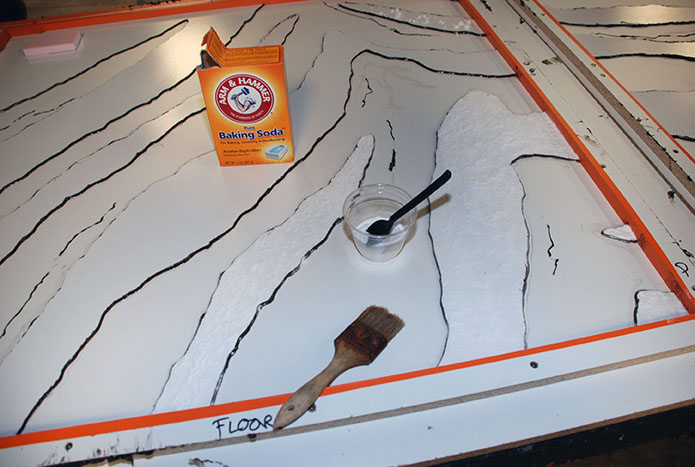
I didn’t worry if there was any excess baking soda. In some areas, a bit of the baking soda spilled over into the molds. I wasn’t too worried about just a few light dustings of baking soda here and there. You’ll actually see the results of this later on when I show the photo of the finished piece.
The concrete I used was a very old school basic aggregate based mix. It was pea gravel and sand and cement and some other ingredients to make a very high compressive strength concrete. These are just wall panels, and I just had to be able to handle them. So there’s no reinforcing, there’s no fibers. The panels are plenty strong enough to cast and handle and then glue up onto the wall.
Typically wall panels are made with GFRC, and for that I would use a well-designed mix with the right balance of workability and strength, such as PowerBlend.
To prevent the baking soda from being disturbed, I poured the concrete in between the areas that had the baking soda. This kept the concrete from flowing down and scraping or smearing the baking soda. That would give a different look and that’s not something that I really wanted. So I poured in between and let the spaces overfill and then flow over onto the baking soda. This gives a less disturbed look and preserves the texture of the baking soda.
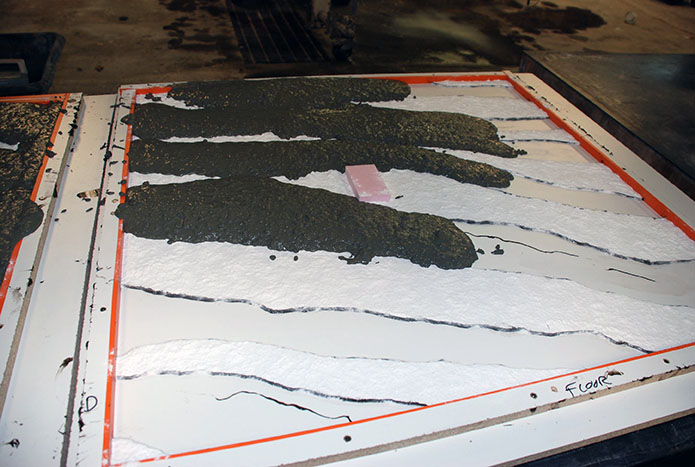
In some areas, it did end up pushing and plowing the baking soda. That created an interesting texture that you’ll see at the end.
In the photo below, the forms are filled. Where the concrete didn’t totally overflow onto the baking soda. I just used a gloved hand to pat the concrete and let the pressure and the movement of the concrete roll over the baking soda and merge within itself. You can see the influences of this in the finished piece. Basically I was trying to cover the baking soda without disturbing it, but in some cases it did get disturbed.
There are lots of different techniques that you could use to cast onto baking soda. If you did want to really aggressively move the concrete around, you could first fill the forms. Then you could use your hands to push the concrete around. That’s going to wrinkle the baking soda and create a lot more fissures and wrinkles and texture in the concrete.
It’s also possible to do vertical surfaces. In this project the baking soda is just dry. You can’t put a dry baking soda on a vertical surface. But if you pre-dampen it with water and make a very thick paste, that paste will stick to a vertical surface. So there are ways to get texture onto a vertical surface too.
Once the pieces were cured, overnight, they were demolded. Freshly out of the mold, most of the baking soda didn’t dissolve, and a lot of it stayed stuck to the mold. In the following photo you can see excess baking soda that’s still on the surface.
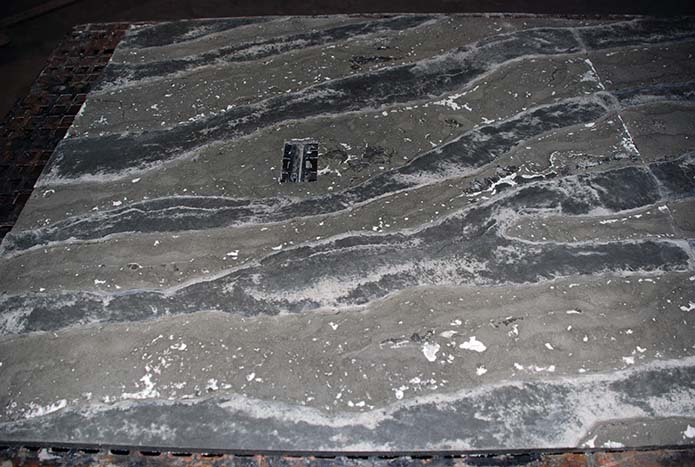
Baking soda dissolves in water very easily, so clean up is super simple. Just hose it off and use a stiff bristle brush to scrub out any areas that don’t dissolve on their own. If you really wanted to get every trace of baking soda out of there, just do an acid etch with a dilute muriatic acid solution. As you know from high school chemistry, an acid and a base (baking soda is alkaline) will react and neutralize each other, and the residue will dissolve very easily.
One thing you will also notice in the photo above is the difference in appearance. The areas that had the baking soda are lighter, and the areas that didn’t have baking soda are darker. That’s another effect that baking soda has on concrete. The color of your concrete, whether it’s gray based cement or white based cement, will influence that. This is a gray Portland cement based concrete, so the effect of the baking soda is even more pronounced. But you should always expect the baking soda to influence the appearance of your concrete.
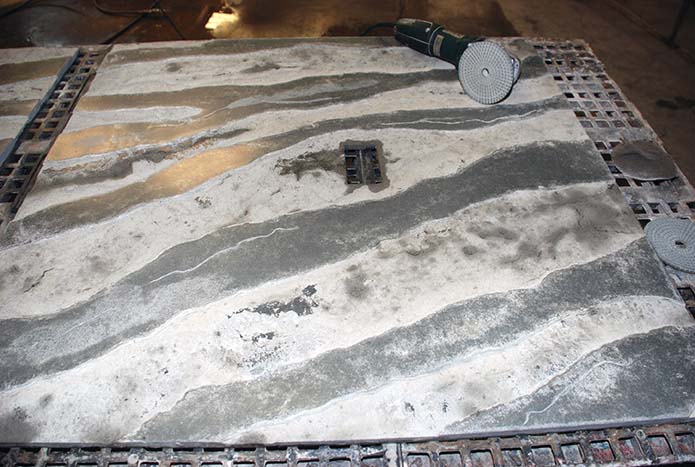
Once the panels were washed and mostly dry, I polished the tops of the high areas that were smooth (those were the low spots in the forms) to boost the contrast. That gave not only a visual contrast of shade, but also of sheen. You can see in the photo below there’s a slight sheen on the polished areas. The low spots which had the baking soda are rough, dull and lighter in color.
Once polished, these panels benefit from a high-performance sealer to protect the surface and enhance the contrast. For wall panels with varied texture like this, Ovation Concrete Sealer provides excellent protection with a natural look that won’t fill in the textured areas.
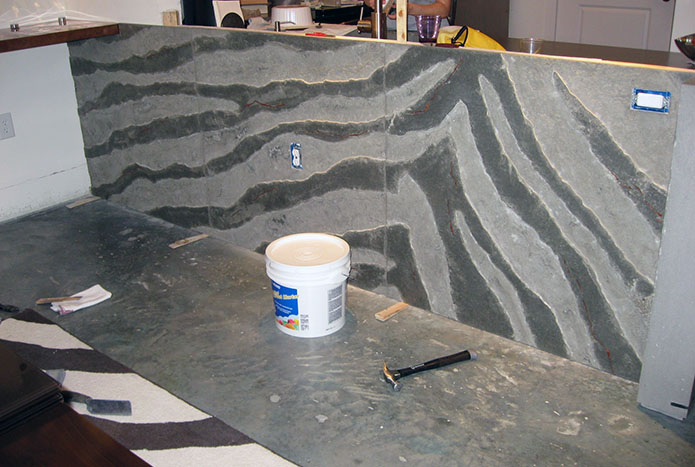
Applying the panels to the wall is just like you’d put any kind of tile on a wall with commercial thinset.
I then caulked the seams and put on the cover plates. In the photo below, you can see where I expanded the pattern to ensure the outlet cover plate wasn’t crowding the pattern. That way it looks a little more balanced and natural.
This whole project took maybe two days, so it’s very fast.
Want hands-on guidance? This baking soda technique is one of many decorative concrete methods we teach in our workshops. Working with GFRC opens up even more possibilities for lightweight architectural concrete panels.
→ View upcoming workshops
→ Explore GFRC training
For the copper veins, I used copper metallic pigment commonly used in epoxy floors or car paint. It’s all the same stuff. The pigment for car paint is a lot more refined and more expensive, but it doesn’t take a lot. I simply mixed the copper pigment into a clear epoxy. The purpose was to tie the panels in with a copper bar on the left.
Below is another view of the other end of the bar. You can see more of the sheen from the overhead pendant lights. The 3″ thick walnut bar top that sits on top of this whole thing isn’t in place yet.
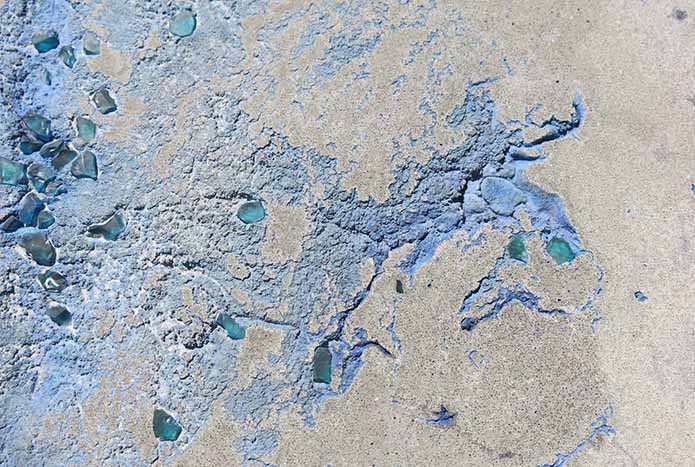
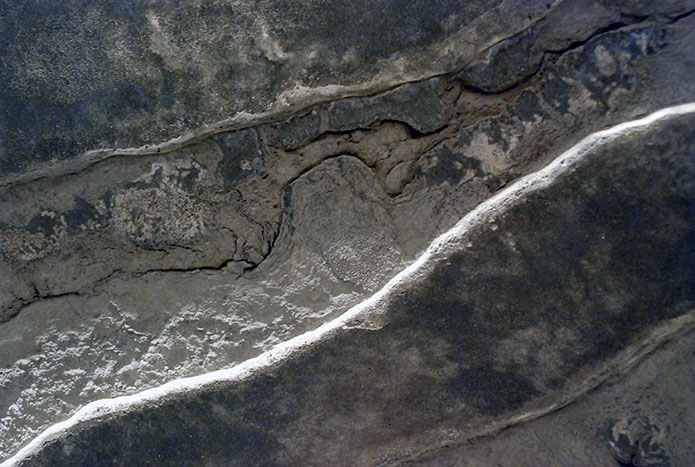
Here’s a close up of one of the areas, that really shows what baking soda can do for you. Remember, the concrete that I used had pea gravel in it. All the roundish lumps you can see are artifacts of the pea gravel that pushed into the thick layer of baking soda. The heavy stone made an impression into the baking soda. That would not have happened with a light dusting of baking soda.
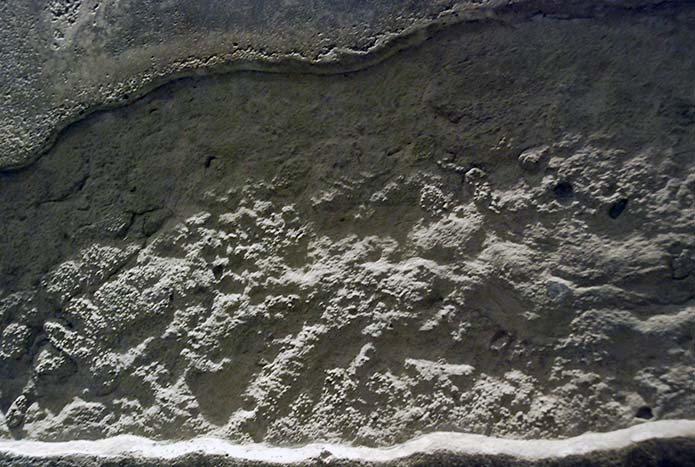
If you want to see what it looks like with just a light dusting, you can see that in flat area above the textured area. On the edge, you can see a slight crevice and a slightly lighter color. Those are the areas where some of the excess baking soda spilled over into the empty parts of the mold.
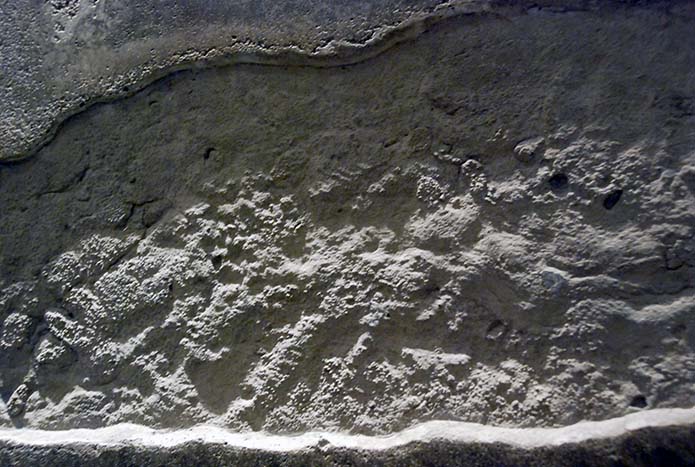
Here is another closeup showing more texture. You can see I was really going for a lot of texture in this, in the contrast. You can tell that the “peninsula” extending from bottom right to center had a lot of excess baking soda spilled into it, because it is light and slightly textured. I didn’t bother cleaning that excess baking soda out of the mold in that area. I wanted a lot of texture variations in this project.
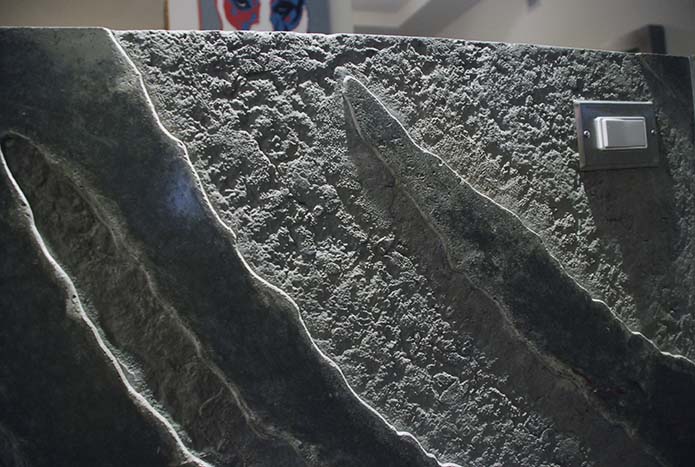
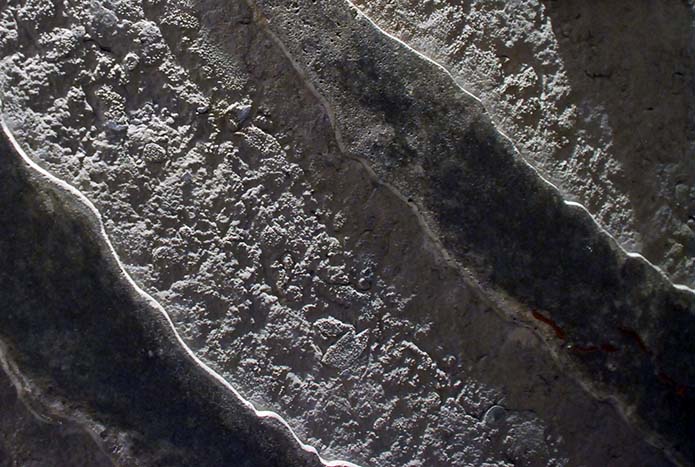
The photo below highlights what happens when the concrete pushes and plows the baking soda, and the baking soda collects in between the concrete. Remember, I poured the concrete into the low spots of the mold (the high spots in the finished piece). As these areas overflowed and flowed together, that concrete flowed across the baking soda on the high spots of the mold (the low spots in the finished piece), from both sides. As the sides of the concrete flow touched the baking soda, they stiffened up very quickly and formed a crust. That crust did not flow and blend into itself. It created a defined fissure in the finished piece.
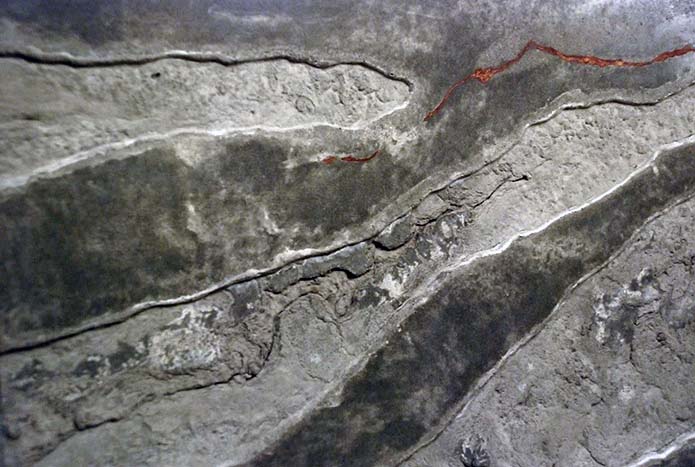
I find this to be fascinating. That’s what happens when you put a thicker layer of baking soda, and then you physically push concrete horizontally to make it smear and slide the layer of baking soda together. The more you manipulate the concrete during casting and immediately after casting, the more texture and interesting things will happen.
This is a very simple and easy and old school way of creating lots of natural looking texture. Experiment, have fun, and share what you’ve done. I’d like to see it.
Next Steps: Take Your Concrete Work Further
This baking soda technique is just one tool in the creative concrete toolkit. Here’s how to continue learning:
For DIY Enthusiasts:
– Creative concrete project guides – Start with tested projects and proven techniques
– Get Weekly Inspiration – Get project ideas, tips, and success stories delivered to your inbox
– Browse beginner-friendly courses – Self-paced learning at your own speed
For Professional Fabricators:
– Attend a hands-on workshop – Master GFRC, advanced casting, and production techniques
– Explore professional-grade mixes – PowerBlend and Integrity systems for consistent results
Want to discuss your specific project? Whether you’re planning decorative wall panels, custom countertops, or architectural elements, we’re here to help you succeed. Contact Us