When you use GFRC to create concrete elements, making intricate designs is easy, but there are a few tricks to keep in mind, and it does require meticulous attention to detail.
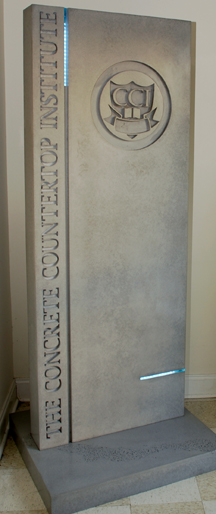
I made what I call “the monolith” for our trade show booth. It’s really a self-standing concrete sign. This is a great product for businesses – you can offer a vertical, 3-dimensional concrete element that is also extremely functional.
The photo series below shows the basic steps in creating the monolith using GFRC. This monolith could have been created using wet cast techniques, but I would have needed a two-sided mold, and vibration could have moved the knockouts inside the mold. GFRC was the clear choice for this project.
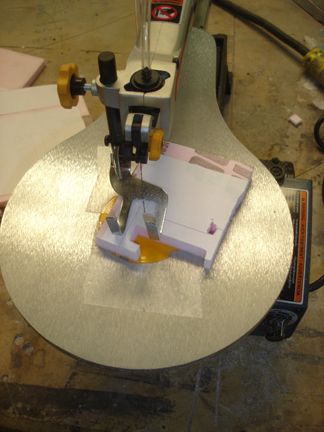
I printed out letters on paper, glued the paper to insulation foam of the desired thickness, then cut out the letters with a scroll saw. I did the same with my logo. This took a lot of time. Alternatively, you could have a sign company create plastic letters and logo based on an electronic file you send them.
I built the mold from melamine and glued in the foam letters. To create a recess, I used a strip of plastic with orange vinyl tape wrapped around it to create a smooth surface. I also used pieces of plate glass. In the photo below, Brad and I are pulling away the excess silicone caulk.
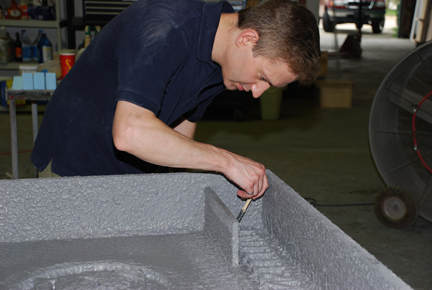
After spraying the mist coat, I had to use a brush to get into every tiny nook and cranny. This was very important to ensure a clean, crisp shape that picked up all the details of the lettering.
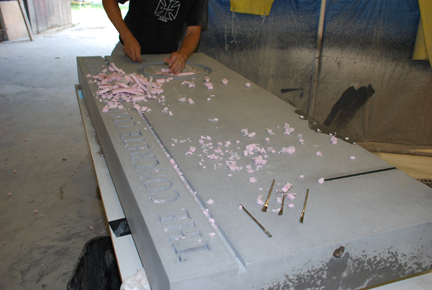
Picking out the foam from the finished piece was very tedious!
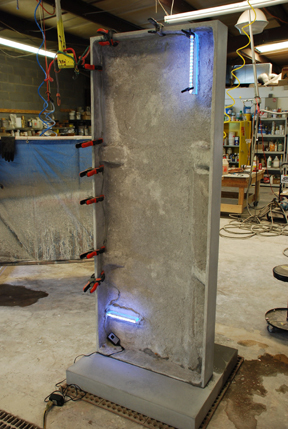
I added LED strips to the back of the plate glass pieces. Note also the four buttresses to create strength, like an airplane wing. The buttresses are foam wedges covered with backer coat.
The finished monolith/sign. (There is also a river of glass in the base. How to create that is another topic.)
My online seminar “3-D GFRC Molds” has more details about this project, as well as detailed information on how to make 3 more complex 3-D GFRC projects. Click here.
