
What’s the worst way to ruin a beautiful concrete countertop? Mess up the installation. This final step in the concrete countertop process isn’t something that you can overlook. Installation is just as important as reinforcing, casting, curing or any of the steps that fall before it. A botched installation can ruin even the most beautiful concrete project.
Installation is a complex topic and I surely can’t cover it all in just one blog post. Today I’ll share some tips for success and in future posts I’ll get into the nuts and bolts of installation. Check back soon for posts on installing an undermount sink, filling in seams, transporting a finished piece and more.
Installation Basics
Installation is the final critical step in a concrete project. It’s an exciting time, but also an important one. Missteps can ruin an entire project, leave the customer unsatisfied and ruining all of your hard work. This is one step that you have to get right. Take your time. Don’t cut corners.
The installation tips I’m sharing here have been divided into a few categories. The first tips focus on things to do BEFORE the installation starts. Then I’ll share some tips for the actual installation of the countertops and finally we’ll look at ways to finish an installation up beautifully. These tips will help you prevent problems, ensure safety and achieve a picture perfect installation every time.
Before Installation
Make Sure the Job Site is Really Ready
Before you load up a countertop and head out to install, make sure the site is really ready. Talk with the homeowner or general contractor and explain the needed preparations before installation. I like to have them sign a checklist stating that there is a clear path to the installation site, that there is no construction debris on the cabinets, etc. Most importantly, make sure any needed cabinet modifications are complete. While a signed checklist won’t always guarantee a perfect job site, it will help you create a paper trail to support additional charges for a second delivery when the job site is actually ready.
Make a List… And Check it Twice
Running back to the shop for a forgotten tool is a big waste of time. Make a list of all the tools, materials, etc. you might need during the install. Store all of these installation tools together in a designated area and make sure you have everything before you head out to the job site.
Plan the Order of Installation
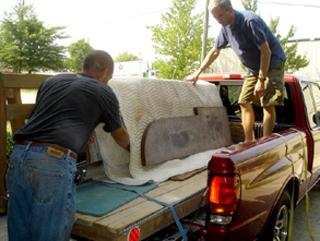
With concrete slabs potentially weighting hundreds of pounds you don’t want to have to load and unload looking for the next piece. Make a plan for the order of installation and load each piece into the truck accordingly. Start with the last slab you’ll install and work backwards to the first slab.
Take Templates and Photos
Sometimes cabinets get moved around or altered after templating resulting in the finished slabs not fitting. Take your templates and any photos you’ve taken with you to the installation so you can easily prove that the cabinets have been moved or altered if needs be.
During the Installation
Install Sink Supports First
One of the first things you’ll want to install is the sink supports. Don’t let the concrete itself support an undermount sink. Instead use a commercially available sink support system or build one of your own using plywood or 2x4s.
Prepare a Pathway
Before you start carrying heavy slabs walk from your truck to the installation area looking for any potential obstacles. Identify problem areas like stairs, corners, etc. Set up sawhorses in areas where you feel you may need a rest so you’ll have a safe place to set your slab. This step is critical for both safety and protecting your countertops.
Dry Fit First
Dry fit all of your slabs before you start gluing down. This will give you an opportunity to make minor adjustments in the field. Once you’re satisfied that everything fits together as it should you can start attaching.
The Finishing Touches
Shim Neatly
Once your countertops are in place you’ll likely need to add shims. I find that shims are needed on almost every installation. If you need to use shims on a front edge trim shims flush with the front of the cabinet and then push the shims in about 1/8”. Run a bead of color matched caulk in the gap between the underside of the countertop and the top of the cabinet. Use a caulk color that matches either the countertop or the cabinets. This will fill the gap and hide the shims. I find that this process makes the finished installation clean, neat and very attractive.
Use Flexible Caulk for Seaming
Using a rigid adhesive like an epoxy can cause your countertops to crack, especially if movement occurs at or near a joint. The reasoning for this is the way concrete is reinforced. Concrete is reinforced throughout its length, but not at its ends. Flexible caulk acts as a stress relief allowing for slight movement without high tensile stresses.
A smooth installation is a great way to finish off a concrete project.
For a complete step by step instruction manual on installation, click here.