
My students and I have made lounge chairs in several classes. You may be aware that I have an online seminar about how to make a concrete lounge chair.
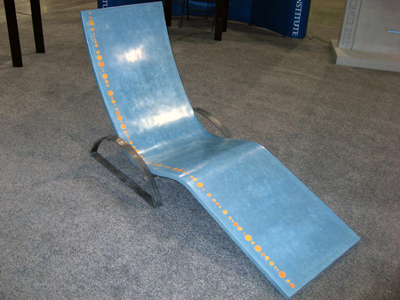
But have you seen this polka dotted lounge chair I created? This is a technique that makes it easy to create multi-colored designs in concrete furniture, concrete countertops and more.
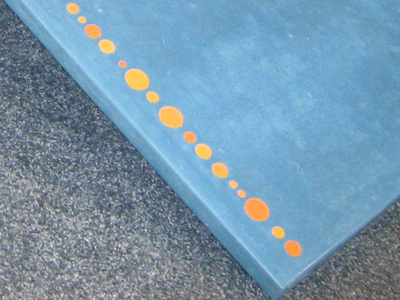
The polka dots are simply different colored concrete grout. Here’s how to create this effect:
1. Create the knockouts for the colored dots.
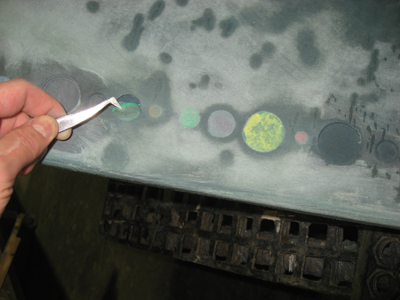
I found these dots in a craft store. They are a dense, flexible foam, and they come in various shapes and sizes. (I chose not to use the heart shapes, but perhaps you could use them for a Valentine’s Day present.)
If you don’t have ready-made shapes, you could hand cut foam or have a custom sign shop cut out foam or plastic for you.
2. Apply the dots to the mold.
These dots are self-adhesive, so they were super-easy to use. If you are using custom shapes, adhere them to the mold with spray adhesive. Be sure to spray the back of the shape, not the mold.
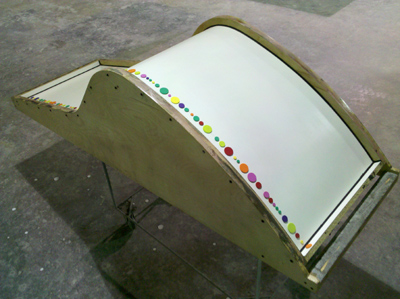
Use care in placing the shapes. In this case, I wanted the dots in a straight line, so I drew a straight line on the mold lightly in pencil, and very carefully centered each dot on the line.
Remember, if you’re doing a design such as letters, you will need to put them in the mold in reverse order, so that they read correctly when you strip the mold. I.e., letters that read left to right must be placed in the mold right to left. To make this easier, you can take a digital photo of the letters placed right side up as you want them to appear in the end product. Then print out the photo on a thin piece of paper, and hold it up to the light to see how the letters should appear in reverse order. Or, flip the photo in a photo editor on the computer, then print out the flipped photo.
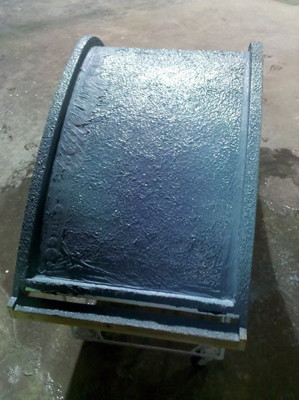
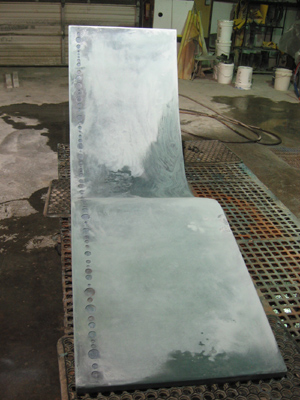
3. Cast the main color of the concrete.
In this case, I used GFRC. I took special care to make sure that mist coat completely encapsulated the dots. I used a chip brush to push mist coat into the crevasses beside the dots.
4. Strip the mold, remove the dots and grout in the main concrete color, taking care not to fill the dots.
Usually GFRC doesn’t really need grouting because there are very few pinholes. But in this case, the blue grout protected the main concrete from the orange grout that was to follow.
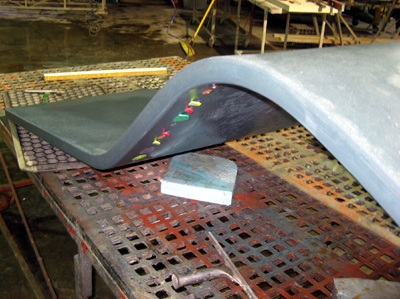
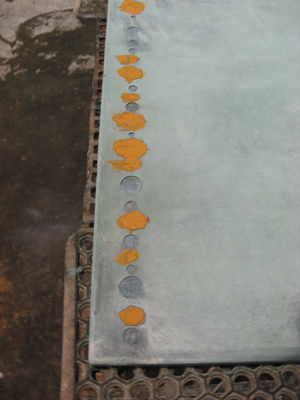
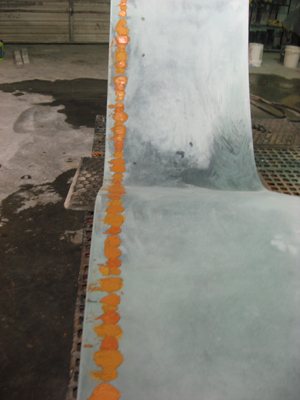
5. Apply colored grout to the dots.
I used 3 different colors of orange, so I mixed up 3 colors of grout and applied them to the dots I wanted to be each color.
I was able to remove all of the dots right up front, because they were far enough apart that I wouldn’t have an issue with different colors of grout running together. If your design has 2 accent colors right next to each other, you will have to remove only 1 shape first and grout that in the desired color, then proceed to the next color.
6. Hone off all of the grout, then seal as desired.
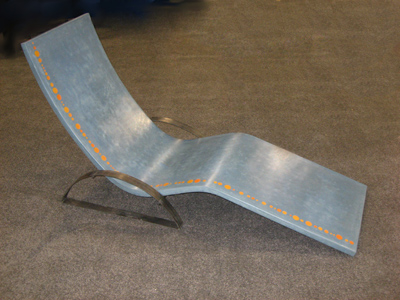
Here is the finished lounge chair. The dots look very precise, and everyone who sees the chair asks, “How did you do that?”
Once you know how to make a concrete lounge chair (my online seminar gives all the details of making the mold), the design possibilities are endless!
This same technique can be used to create company logos or other designs in any kind of concrete creation. For example, check out this article about a retail counter my student Tony Angell of North Metro Concrete and Countertops in Minnesota did for a golf shop.

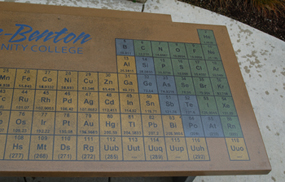
Here’s another complex, multi-colored piece: a table created for a college by my student Preben Petersen of Concrete Lifestyle.
Keep in mind when pricing these projects that it takes a long time to create or acquire the shapes, place them correctly, and spend extra time grouting. This is also a very high value feature for clients, since this technique is difficult or impossible with many other materials. Consider pricing these pieces at least double what you would charge for a plain piece.
With a few grout colors, a little creativity and a lot of precision, you can easily create multi-colored designs that will dazzle your clients and boost your profit.