
Surface preparation before sealing your concrete countertop is the essential first step to ensure success with any topical concrete countertop sealer, including Omega Concrete Countertop Sealer and Ovation Concrete Countertop Sealer.
The full instructions for Omega are here, and the full instructions for Ovation are here. But first, you need to prepare the surface.
The condition your concrete needs to be in before sealing is straightforward and easy to achieve:
- It should cure for at least 2 days after casting.
- Its profile should be microscopically rough. This is done by etching, wet sanding by hand, or machine honing.
- It should be clean.
- It should be dry.
- You should also ensure that the environment you will seal in is suitable.
IMPORTANT: DO NOT DRY GRIND TO PREPARE THE SURFACE. Dry grinding is not the same as wet grinding, even with the same 200 grit. Dry grinding/polishing tends to burnish the concrete surface, making it too smooth for good sealer adhesion. See this article for more information about why, and also what to do it you already dry ground.
1. Curing
Your concrete should be allowed to cure for several days after casting, following good concrete curing practices. This ensures the cement matrix is maturing and the internal moisture levels have been reduced to low levels. For some concrete mixes this happens in a few days, for others it will take longer; you will need to set the time between casting and sealing based on the quality of the concrete you are working with and the conditions it is cured in. With most quality concrete countertop mixes, 2 days following casting is a good start, although more time should be given during cooler periods, and more time is always better if you have time to give. For best results let your concrete cure for at least 4 days prior to sealing.
Summary: If you want the best results, give it time. If you are in a rush, then don’t expect the best results.
2. Profile
The surface of the bare concrete should be visually matte and microscopically rough. In other words, it should have a profile, or tooth, prior to sealing. This ensures the sealer develops a good mechanical bond with the surface.
Before sealing, you want the concrete to have a matte finish, you don’t want to see reflection in the surface. The rougher the surface is, the better the sealer will adhere.
Profiling also removes surficial material or contaminants that would interfere with forming a good bond. Wax and form release agents routinely transfer to the surface of the concrete during casting, and these must be removed before sealing.
Do not rely on acetone alone to entirely remove surface residue like wax or form release agents! Surface blotchiness and uneven color enhancement in cream finishes is often a sign of incomplete removal of surface residue. The concrete must be profiled to remove surface residue and ensure the concrete has some “tooth”.
There are several ways to profile the concrete: Etching, wet-sanding and finally honing. Choose the method that is most appropriate for your concrete. You MUST profile the concrete prior to sealing.
The BEST results are from hand wet-sanding (option 2) or machine honing (option 3) to 200 grit, and then acid etching (option 1).
Option 1: Etching
Acid etching provides a microscopic ‘tooth’ for the sealer and dissolves any weak material in the substrate that may prohibit sealer from fully penetrating and adhering. Etching is most often performed on cream finishes, or concrete that’s left untouched after it is demolded.
Keep in mind acid etching mainly affects the cement paste, and will not change the surface of exposed glass, tile, or exposed stone such as quartz or granite. Etching may not evenly or entirely remove surface residue like wax or form release agents. For that we recommend light wet sanding.
A good starting etching solution is 1 part by volume muriatic (hydrochloric) acid added to 10 parts by volume of clear water. (Always add acid to water, not the other way around.) Apply the dilute acid to wet concrete and scrub the surface with a green Scotchbrite pad for about a minute. Flush the surface with clear water and gently scrub with a clean Scotchbrite pad while rinsing with clear water.
Do not use acetone in place of acid. Acetone is a solvent and not an acid, and it does not etch at all.
Multiple etching sessions may be necessary to ensure complete etching.
Option 2: Wet Sanding by Hand
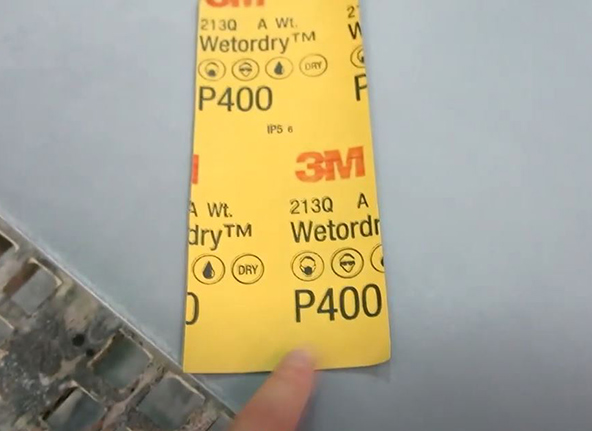
An easy and effective way to lightly work the surface and remove wax and release residue without exposing sand grains is to hand-sand the surface using wet/dry sandpaper. Use 320 to 400 grit paper, as coarser grit sandpaper can leave scratches and can be too aggressive. This kind of sandpaper is the black, silicon-carbide type used to wet sand automotive finishes.
It’s always used wet to prevent scratching the concrete surface, and it’s a great way to remove surface residue and to lightly smooth the concrete’s surface. Be sure to thoroughly wet sand 100% of the surface.
A wet-sanded surface can be acid etched to further enhance the microscopic tooth.
Option 3: Machine Honing
Machine honing with diamonds is often done to expose the sand grains to produce a salt and pepper finish, or, after the concrete has been ground to expose stone or glass aggregate. Machine honing can be done with a random orbit sander, or the more professional method is to use a wet polisher.
A honed surface is one that’s been polished with diamonds to a grit no finer than 400 grit. Ideally the surface is honed to 200 grit. The sealer will bond better to embedded materials that are smooth and non-porous (like glass or metal) when honed to only 200 grit.
It is vital the concrete is not highly polished to make it shiny, as anything finer will make the surface too smooth, and you run the risk of the sealer peeling off.
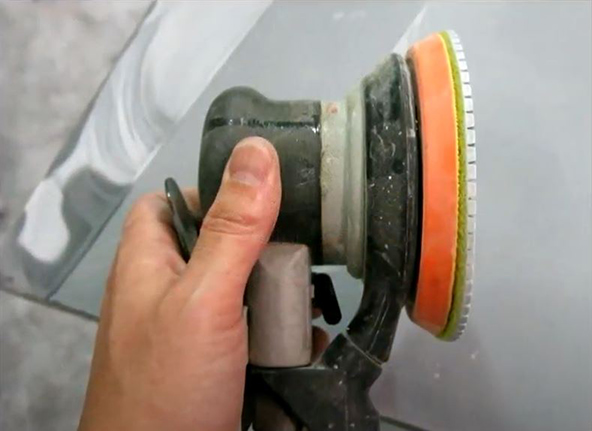
Damp honing with a random orbit sander is a less aggressive and less messy way than using a wet polisher. Simply attach a 5” 100 or 200 grit wet diamond polishing pad to a 5” random orbit sander and wet the concrete to be honed with a sponge or spray bottle.
Best results are achieved by also acid etching after machine honing.
Videos for Options 2 and 3
The first video shows:
- Wet hand sanding with 400 grit wet/dry sandpaper, and a spray bottle with water. This will maintain a cream finish.
- Machine honing with 100 or 200 grit diamond pad on a random orbit sander, and a spray bottle with water. This will likely maintain a cream finish, unless your concrete is soft.
You can also use diamond pads and a traditional electric or pneumatic wet polisher to expose sand grains for a “salt and pepper” finish or to expose decorative aggregate, stopping at 200 grit (or a maximum of 400 grit).
Note that in some cases, wet sanding/honing by hand will change the appearance of the concrete. If you were trying to get a cream finish, you might sand it off and expose sand grains, resulting what I call and salt and pepper finish. If you acid stained or glazed, you will likely remove the coloring.
If you can’t wet sand or hone as shown in the video below, use the muriatic acid etching method explained above.
This video shows more live action footage of machine honing in the context of resealing existing concrete countertops with Omega.
3. Clean
You would not paint over dirt, so spend a moment cleaning the concrete before you seal. You want to do this after you’ve profiled the concrete, since etched, sanded or honed concrete has very fine residue that must be removed before sealing. Use a green scrubby pad to gently remove the fine residue and rinse well with clear water.
4. Dry
Finally, your concrete should be fully dry prior to applying sealer. Dry concrete lets the sealer penetrate into the concrete, whereas wet, damp or barely dry concrete won’t. Damp or wet concrete will inhibit the cure and affect the performance of the sealer.
Wait a minimum of 12 hours (overnight is better) for drying following saturation. Remember, cooler shop temperatures slow evaporation, so if it’s cool where you’re sealing (say below 70°F or 21°C) give the concrete more time to dry out. When in doubt, give it a full day.
Just before sealing, wipe down the concrete with a lint-free cloth dampened with acetone, making sure the acetone is fully evaporated. Acetone also helps remove any surface contamination, like dust and fingerprint oils. You can use 100% acetone, or acetone diluted up to 1:3 with water. Use industrial straight acetone, not nail polish remover.
5. Environment
Humidity
Omega does not need humidity or moisture for curing; in fact, drier conditions are beneficial. Generally, room temperature conditions are acceptable, provided it’s not too damp or cool. Omega needs to dry between coats, so warmer, drier conditions aids in drying. The sealer also benefits from warm curing conditions after the finish has been applied, as warmer temperatures speed the curing reaction.
Ideally, humidity levels should be moderate (35% to 60%). High humidity levels (above 60%) will slow drying and inhibit curing. Very dry conditions (below 35%) may cause flash-drying, which could lead to streaks or surface texture.
Temperature
Acceptable temperatures for sealer application are between 60°- 90°F (16°-32°C). Temperatures below 60°F are not recommended, as it will slow down evaporation and significantly lengthen the cure time of the sealer. Do not apply the sealer in temperatures below 55°F / 13°C. Temperatures above 80°F / 27°C will increase the chance of the sealer flashing off quickly, usually resulting in roller marks. In these conditions, you should apply 2 primer coats.
Condensation
The sealer should never be applied in conditions where condensation may occur. Always apply, and then cure the sealer, when the concrete’s temperature is at least 5°F (3°C) above the dew point and will remain warmer than the expected dew point during the first 24 hours after application.
The dew point is the temperature at which moisture condenses from the air, and it is associated with relative humidity. A high relative humidity indicates that the dew point is closer to the current air temperature. Just like a glass of ice water on a hot summer’s day, cold concrete in a warm, moist environment will create condensation on the surface.
Your concrete should always be at, or warmer than, the ambient shop air temperature during the first 24 hours during and after sealing.
Dust
Your shop should not be dusty at the time of sealing. Before sealing, avoid any activity that could cause dust to become airborne, such as: sweeping the floor, cutting wood/melamine, weighing out cement, etc.
Air Flow
Having a gentle breeze in the shop can be helpful during the curing process.